Empower Your Brand
This is your opportunity to create a distinctive and recognisable online presence. By personalising the reseller hosting branding in your Plesk dashboard, you can establish a robust brand image that not only sets your business apart from competitors, but also fosters trust among your customers. Your clients will appreciate being greeted with your custom logo and company colours each time they log into their dashboard. It’s a subtle yet powerful means of boosting your brand’s recognition and loyalty. This could make the difference between a one-off sale and a lifelong customer. In this article, we explain how to adjust the settings, add branding, and introduce personalised buttons to Plesk that, for instance, can link to pages on your own website.
So, are you ready to give your Plesk dashboard a personal touch? In the following steps, we’ll guide you on exactly how to do this.”
Prerequisites
- Whitelabel reseller hosting plan
- Plesk Host Edition (standard with the reseller hosting plan)
How do you personalize Plesk for your own brand?
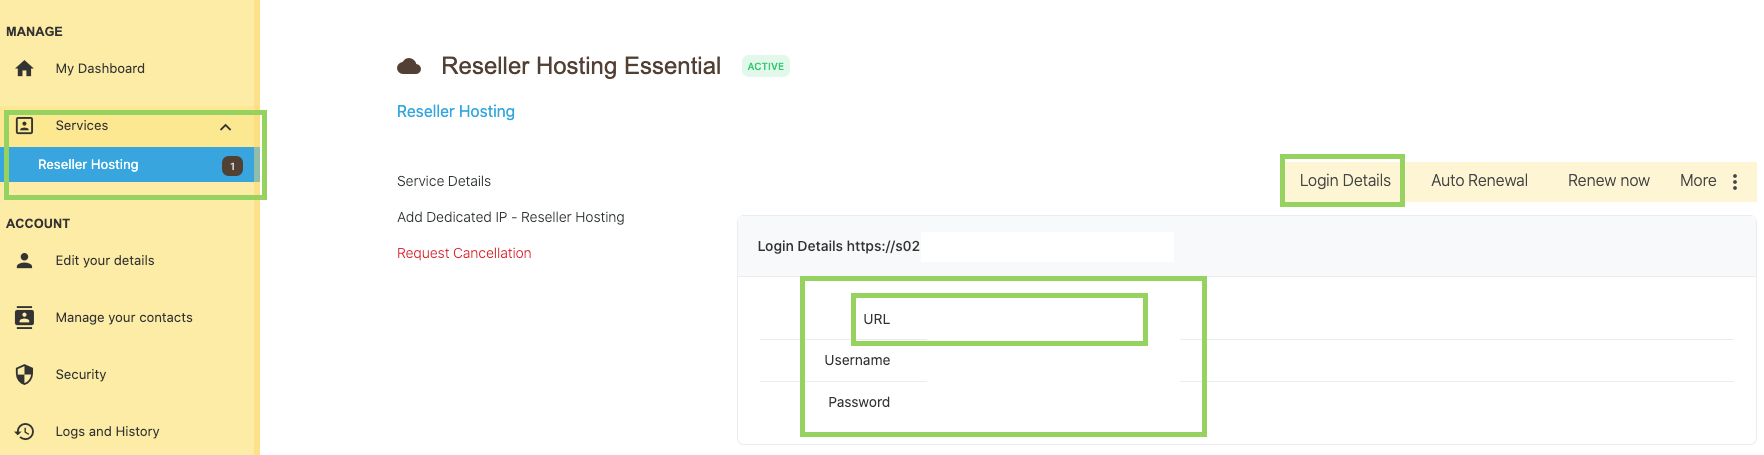
Step 1: Login to your Snel.com Clientarea and into Plesk
1.1 Login to your Clientarea
1.2 There you will see your active services in the Dashboard, click on Reseller Hosting
1.3 When you are in your package, click on login details at the top right to see the Plesk login details
1.4 Log in to your Plesk panel. You can do this by clicking on the URL under login details that will take you to the Plesk login screen. Here you can enter your username and password.
Step 2: Personalize the settings
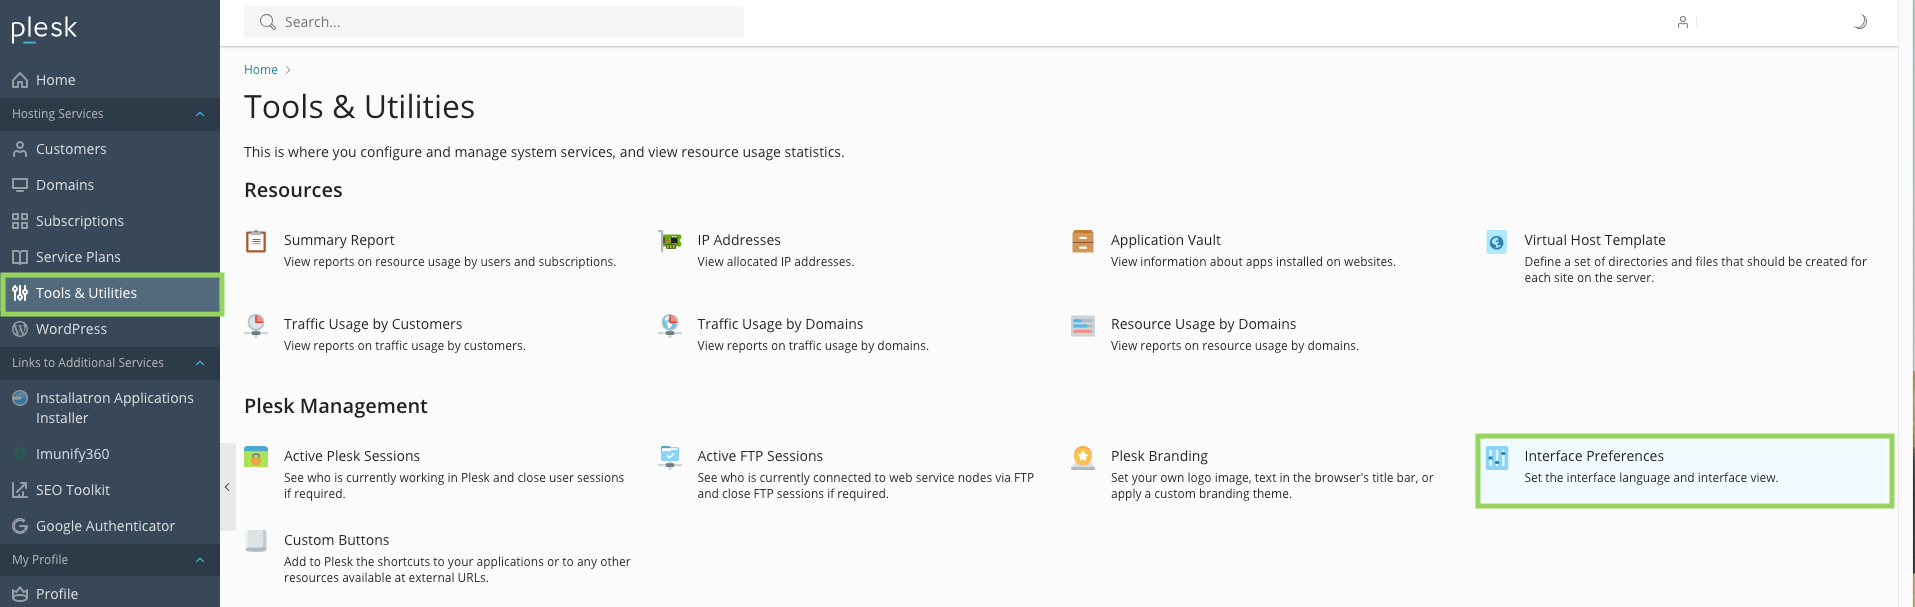
2.1 In the left panel, click on “Utilities”.
2.2 Then click on “Screen Preferences”.
2.3. Adjust the “interface language” of your Plesk interface
2.4 Adjust the “interface view”. The provider view offers you the possibility to manage all your reseller settings, the power user view offers you the possibility to manage websites for customers.
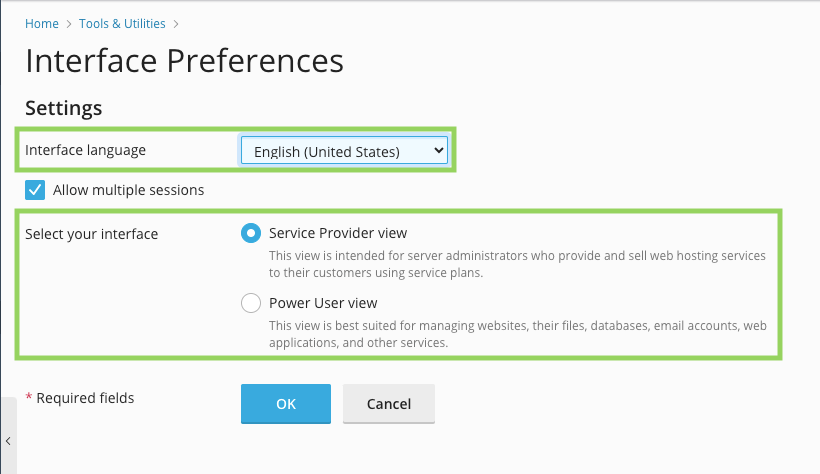
2.5 Click “OK” to save these settings.
Step 3: Personalize the corporate identity
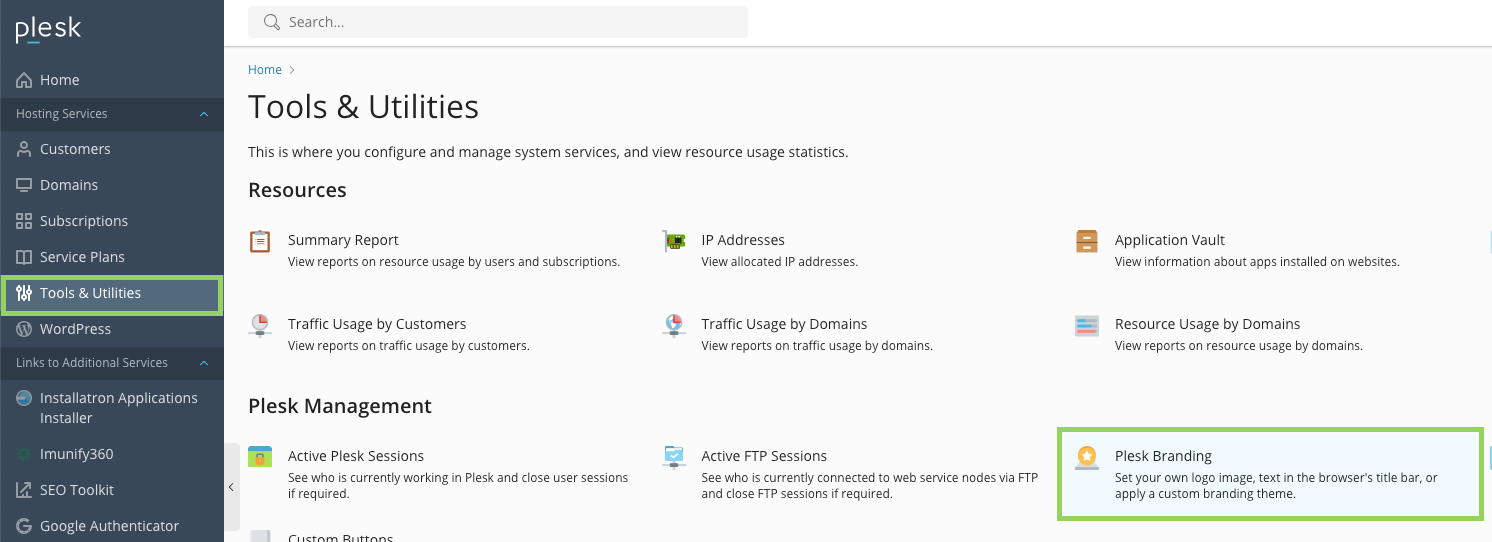
3.1 In the left panel, click on “Utilities”.
3.2 Then click on “Branding from Plesk”.
3.3 Check “Enable custom title on Plesk pages” to display your company name or slogan.
3.4 Check “Enable custom panel logo” (The logo will appear to the customer in the top left corner instead of the Plesk logo) upload a file with your logo or enter a URL to your logo.
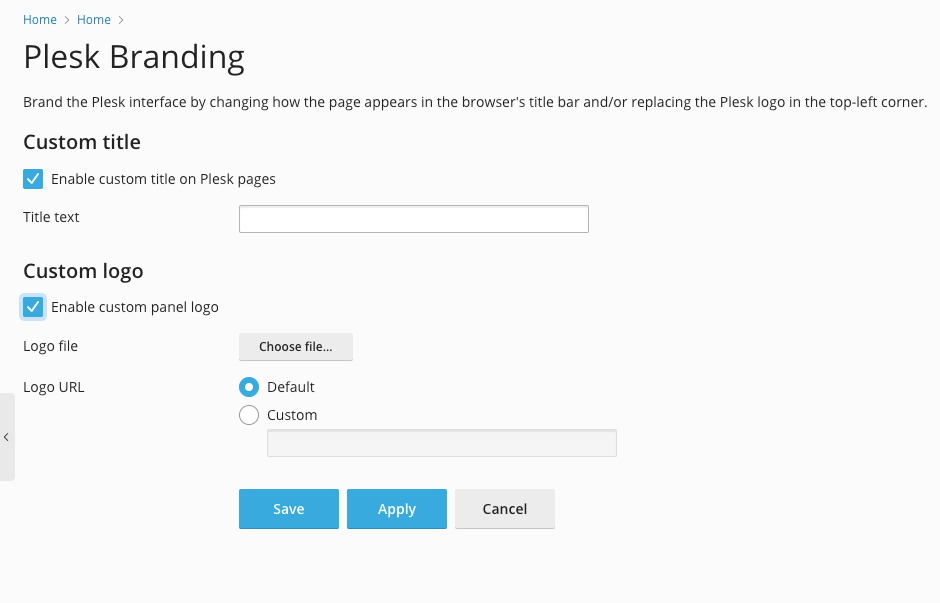
3.5 Click the “Save” button
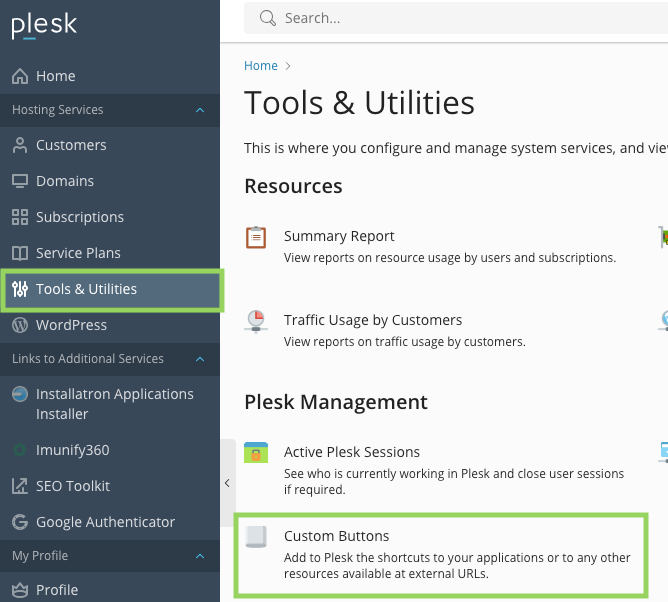
Step 4: Add default buttons
It is possible to add standard buttons to the home page of your own or your customer’s Plesk environment. For example, you can link here to your terms of service, to support, to a homepage or other important links.
4.1 In the left panel, click “Tools & Utilities”.
4.2 Then click on “Custom Buttons”.
4.3 Click on “+Add link to service”
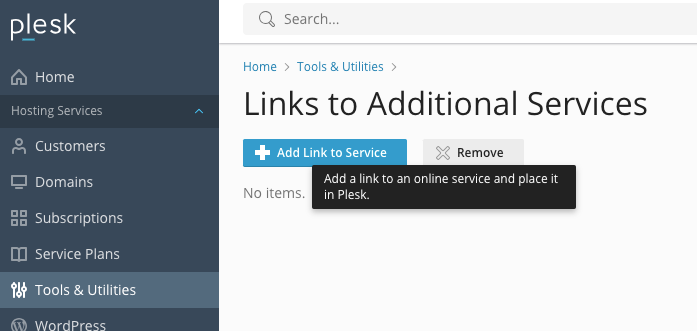
4.4 Check “show to me only” if only you should be able to see this button, uncheck if this button should be visible in the customers Plesk panel.
4.5 Fill in the data as desired
4.6 At “Location” you set where you or your customer will see this button
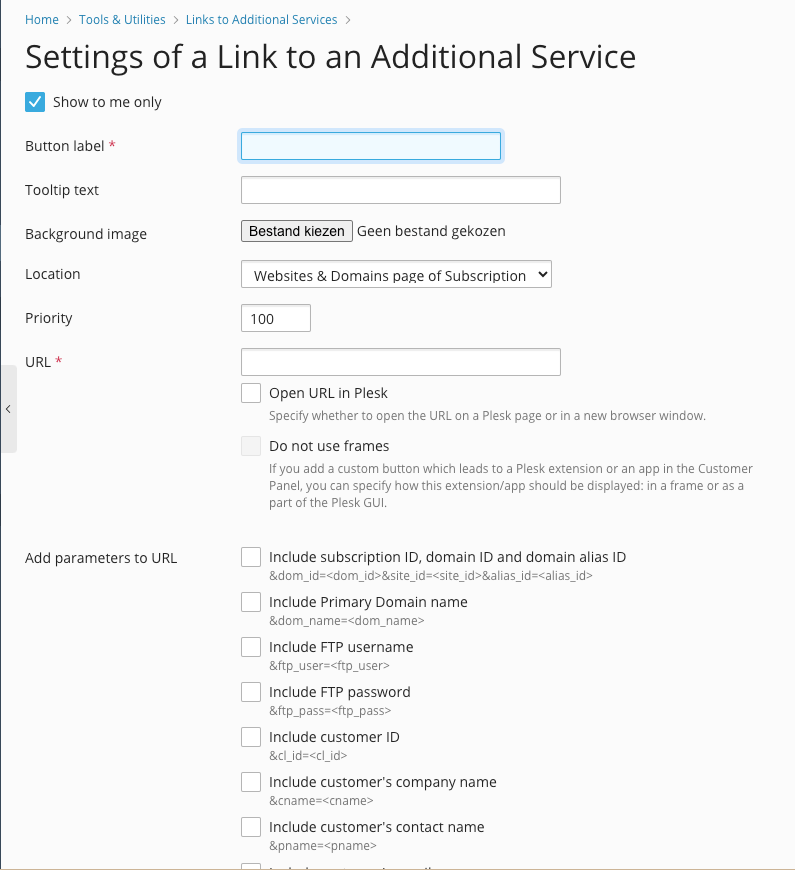
4.6 Click “OK” to save these settings.
You are Ready to share your hosting brand with customers
That’s it, the steps to fully personalize your Plesk dashboard and implement your own brand identity in your reseller hosting branding. By making these simple changes, you’ve taken your company’s recognisability and professionalism to the next level. This can make a world of difference in the perception of your customers, and ultimately help you build a stronger, more sustainable brand. If you haven’t already done so, you can now continue creating Hosting packages and creating customers.
Source: Full Official Plesk manual

Leave a Reply