Introduction
In this article, we will help you to configure a Let’s Encrypt client on Windows Server 2019 and how you can enable and configure your SSL certificate on your Apache webserver.
Prerequisites
- VPS or Dedicated Server with Windows Server 2019 installed.
- You must be logged in via Remote Desktop Protocol as an administrative user.
- Installed Apache 2.4 in
C:\Apache24 - A domain name pointed towards your VPS or Dedicated server. In this tutorial, we will use s30426.hosted-by-snel.com. Replace all occurrences of s30426.hosted-by-snel.com with your actual domain name.
Step 1: Log in with RDP into Windows Server 2019
Connect to your server with the login credentials which you can find in your client area.
Step 2: Download Let’s Encrypt client
We will use Win-acme for issuing an SSL certificate. Visit the website of Win-acme to download the latest version. Extract the download zip to C:\win-acme
Step 3: Run Win-acme Let’s Encrypt client
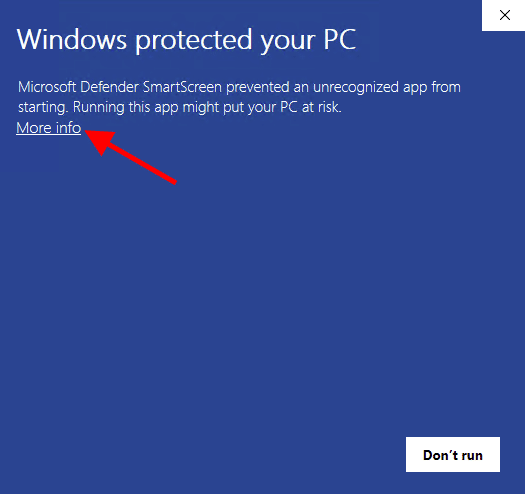
Start wacs with administrator permission. If Microsoft Defender SmartScreen is enabled it will ask your permission.
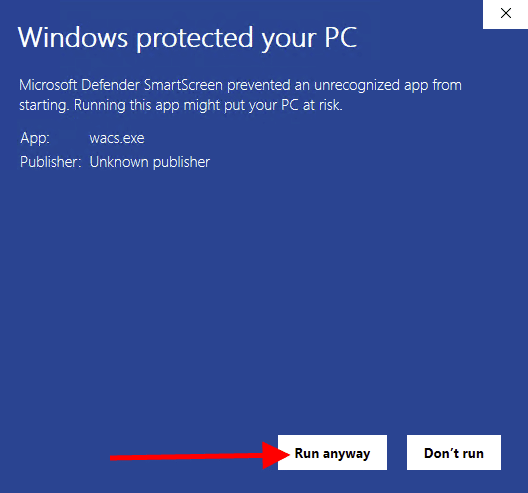
Click on More info . A new button will appear and click on Run anyway.
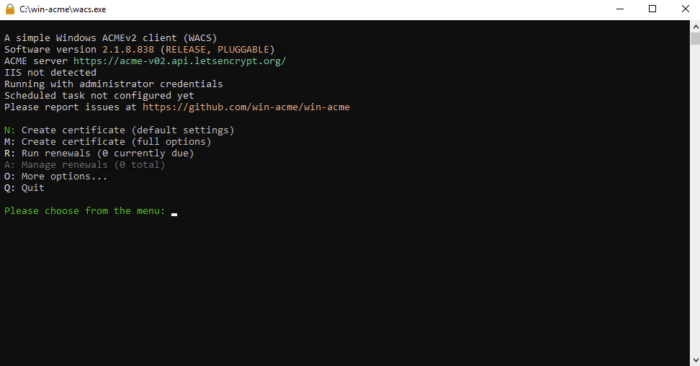
Win-acme will start
Step 4: Create a batch file
Create the following filename C:\win-acme\Scripts\RestartApache.bat
net stop "Apache2.4" & sc start "Apache2.4"
Step 5: Issue certificate
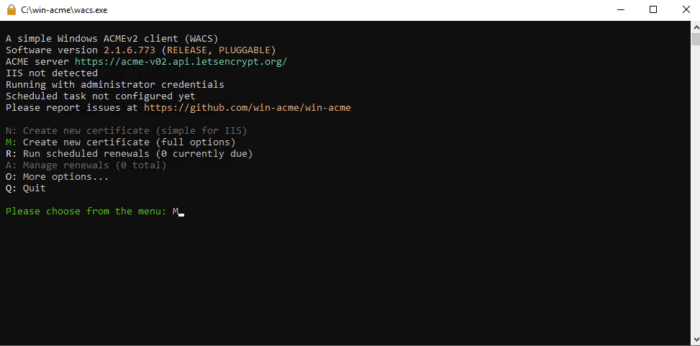
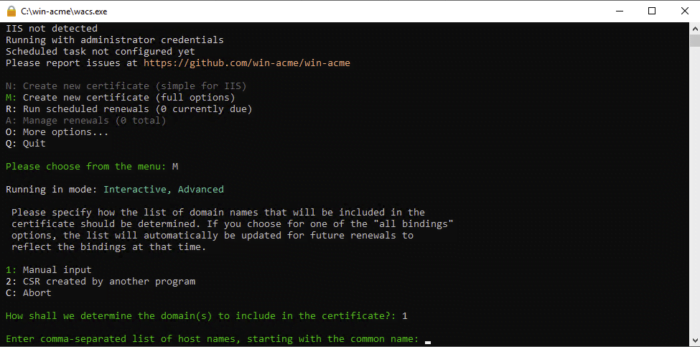
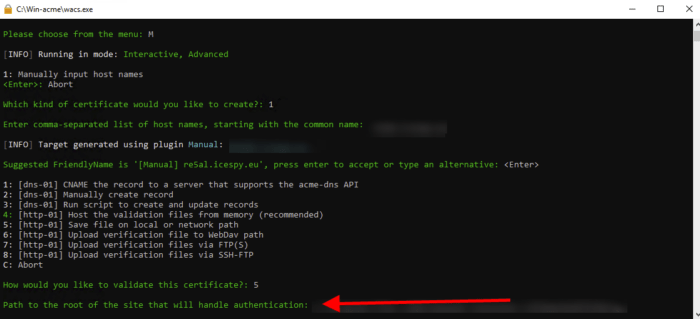
Enter M in the command prompt en hit enter.
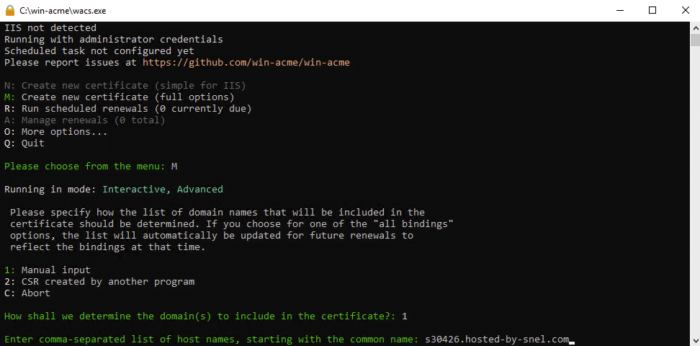
Choose manual input in our situation, it’s option 1.
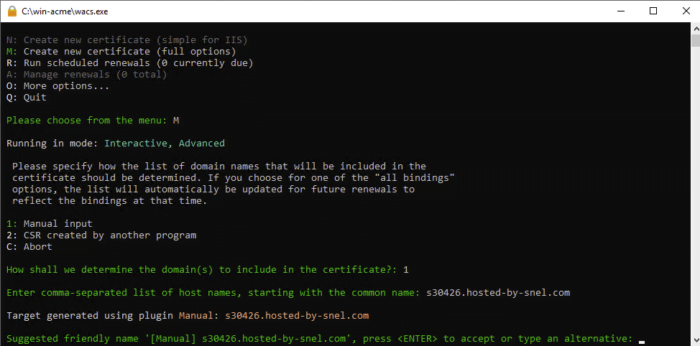
Enter the domain name where you want to issue a certificate. In our article it’s: s30426.hosted-by-snel.com
It will ask you for a friendly name, we leave it blank. Hit enter to continue.
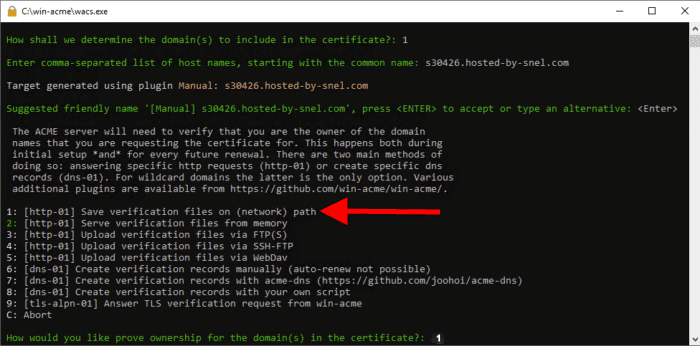
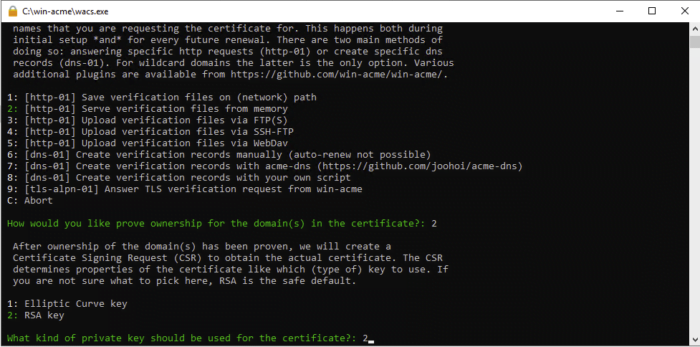
It will ask how you want to verify that you are the owner of that domain. In our case, s30426.hosted-by-snel.com is already pointing to our server and is active in Apache. In our setup, we choose option 1 [http-01] Serve verification files on (network) path.
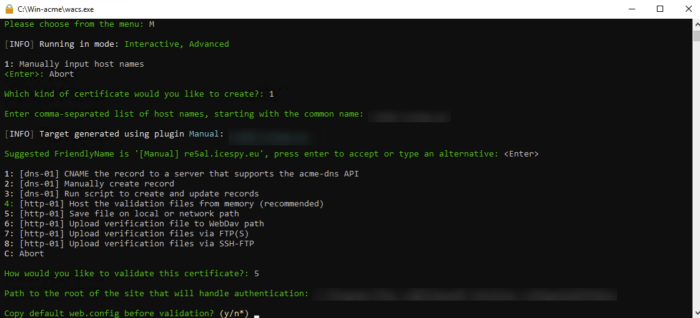
Since we have chosen network path it will ask us for a path, in our case its C:\Apache24\htdocs
It will ask you if you want to copy the default web.config before validation. We choose N
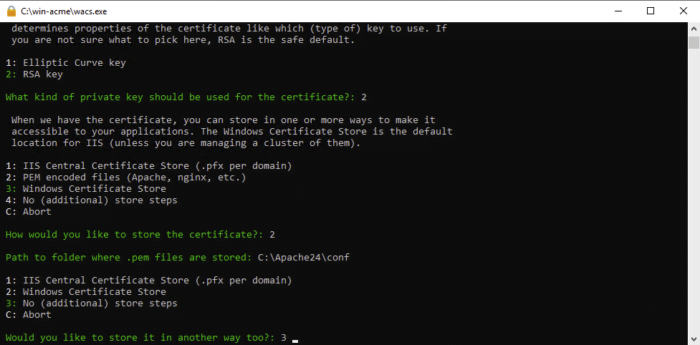
It will what type of private key we want. We will choose option 2 RSA key as a private key.
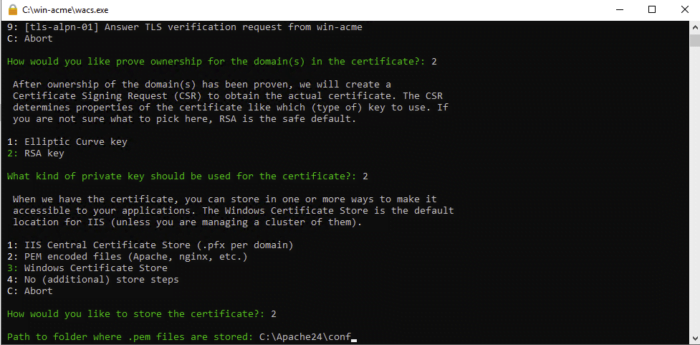
Since we want to use the SSL certificate on our Apache webserver we will choose option 2 PEM encoded files (Apache, nginx, etc.) and hit enter. Once PEM is selected it will ask you where to store those files. In our case it’s C:\Apache24\conf.
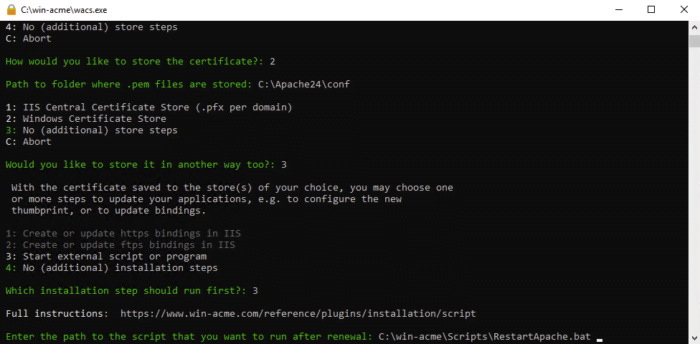
We do not want to store it another way and we select option 3 No (additional) store steps and hit enter.
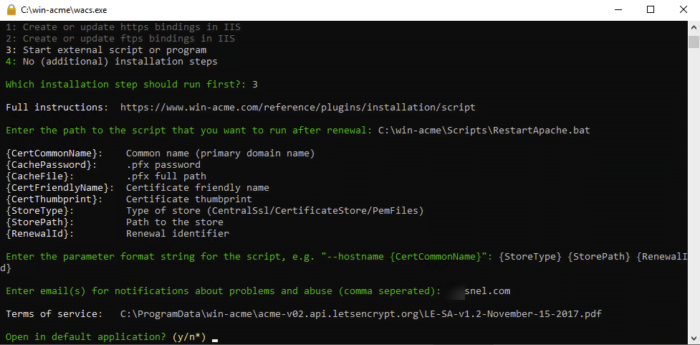
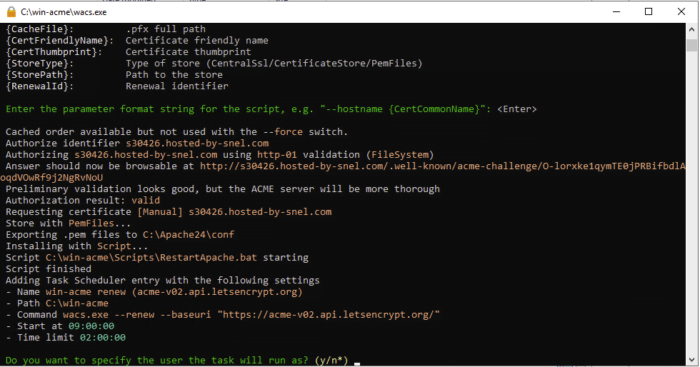
Once the new certificate is saved we do want to perform an extra step and choose for option 3 Start external script or program. It will ask the script path that you want to run after renewal C:\win-acme\Scripts\RestartApache.bat.
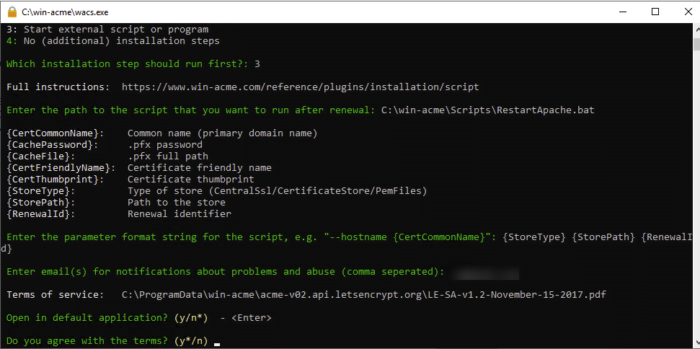
Enter the following {StoreType} {StorePath} {RenewalId}. Once this is entered it will ask where you want to receive notification and fill in your email address.
It will ask you if you want to open in default application choose for N and accept the terms with Y.
Run the task under a specific user, since it requires a user with administrator permissions.
Step 6: Enable SSL if it’s not enabled yet
If SSL is already enabled for your Apache webserver you can continue to step 7. Open the httpd configuration file C:/Apache24/conf/httpd.conf. In the httpd.conf file changes the following lines by removing the comment sign #:
Loadmodule ssl_module modules/mod_ssl.so
Include conf/extra/httpd-default.conf
Include conf/extra/httpd-ssl.conf
Do an Apache configuration file check. Start command prompt with administration permission. Run de following command:
cd C:\Apache24\bin
httpd.exe -t
The output should give Syntax OK if there is no error in the configuration file.
Step 7: Configure SSL for the newly issued certificate.
Open the httpd-ssl configuration file located here C:/Apache24/conf/extra/httpd-ssl.conf.
Change the SSLCertificateFile:
SSLCertificateFile "${SRVROOT}/conf/server.crt"with
SSLCertificateFile "${SRVROOT}/conf/s30426.hosted-by-snel.com-chain.pem"Change the SSLCertificateKeyFile :
SSLCertificateKeyFile "${SRVROOT}/conf/server.key"with
SSLCertificateKeyFile "${SRVROOT}/conf/s30426.hosted-by-snel.com-key.pem"Change the SSLCipherSuite:
SSLCipherSuite HIGH:MEDIUM:!MD5:!RC4:!3DES
SSLProxyCipherSuite HIGH:MEDIUM:!MD5:!RC4:!3DES
with
SSLCipherSuite ECDH+AESGCM256:ECDH+CHACHA20:DH+AESGCM256:ECDH+AES256:DH+AES256:!aNULL:!MD5:!DSS
SSLProxyCipherSuite ECDH+AESGCM256:ECDH+CHACHA20:DH+AESGCM256:ECDH+AES256:DH+AES256:!aNULL:!MD5:!DSS
Change SSL protocol
SSLProtocol all -SSLv3
SSLProxyProtocol all -SSLv3
With
SSLProtocol all -SSLv3 -TLSv1 -TLSv1.1
SSLProxyProtocol all -SSLv3 -TLSv1 -TLSv1.1
Change VirtualHost
#   General setup for the virtual host
DocumentRoot "${SRVROOT}/htdocs"
ServerName www.example.com:443
ServerAdmin [email protected]
ErrorLog "${SRVROOT}/logs/error.log"
TransferLog "${SRVROOT}/logs/access.log"
With
#   General setup for the virtual host
DocumentRoot "${SRVROOT}/htdocs"
ServerName s30426.hosted-by-snel.com:443
ServerAdmin <[email protected]>
ErrorLog "${SRVROOT}/logs/error.log"
TransferLog "${SRVROOT}/logs/access.log"
Save the changes. Re-check the Apache configuration on the command prompt. Start command prompt with administration permission. Run de following command:
cd C:/Apache24/bin
httpd.exe -t
If everything is OK. Restart Apache webserver via command prompt. Start command prompt with administration permission. Run de following command:
cd C:/Apache24/bin
httpd -k restart
Step 8: Verify that SSL is working
Visit the website on your browser: https://s30426.hosted-by-snel.com
Conclusion
In this article, we described how you can install a Let’s Encrypt client a configure Apache webserver on Windows to use the issues SSL certificate.



Hello,
Great article it got me up and going. Is there a way to automatically renew certificates after 90 days.
Thanks
WinAcme will create a renewal task if you followed our article as described in step 6:
"Run the task under a specific user, since it requires a user with administrator permissions.". Which will perform a restart of the Apache server after a succesfull renewal.
I must of skipped that test. I see the the restartapache.bat file but its empty. Is there a way i can manually add the entries in the batch file and then I assume i will have to add a windows task scheduler tito run it every 90 days.
We created the restartapache.bat ourself which can be found in step 4, where you can see the content of it. You can go over the process and make the changes you need to make.
Forbidden
You don't have permission to access this resource.
I get this error after configuring everything right.
Great !!! I configured Apache for Django and all work fine. Only I had to do a change, I removed the comment sign # at the line :
LoadModule socache_shmcb_module modules/mod_socache_shmcb.so
and all work excelent.
You don't forget to add a permit rule in windows firewall, with a port 443.
Thank you! works like magic 😀
You are a star!
While configuring at end of step 5 I provided invalid credintial and I could not set task to run automatically renew certificates. How can I go back to that step? Appriciate your assistance.
If you open Win-acme client and click on "More Options" you can "(Re)create scheduled task" which should help you to change values.
Thanks so much…
You made my day!
Thank you so much.
How can i do this procedure on Windows Server Core passing parameters only?
on what does the win-acme needs to be installed?
since we install our web application on a joined domain server but does not have internet access, each time now it tells (initial connection failed)
but can i run it on my client machine (laptop) generate one, and via our fileserver to import it in the web application server?
Our knowledge base assumes that you have a internet connection.
Thanks!
Hello,
Thanks a lot for this article. It makes me better undestand how to proceed. However, I got an error at the stage of proving the ownership of my domain.
which method do you use for authenticating your domain?