Introduction
PhpMyAdmin is a totally free and open source, web-based MySQL/MariaDB administration software program written in PHP. It provides users with a simple way to communicate with MySQL via a web browser. In this tutorial, we will explain how to install and secure phpMyAdmin to help you safely use it to supervise your databases from a Linux system.
In this article, you will learn how to install PhpMyAdmin. Be warned: the program is a well-known target for attackers because there is almost no security in the default installation.
Prerequisites
Download the current phpMyAdmin source code (like 4.8.2) and extract it on your server and if you do not find the software then click here. This version of phpMyAdmin is compatible with PHP>= 5.5 and MySQL >= 5.5.
Step 1: Download the latest phpMyAdmin
cd /var/www/example.com/
wget https://files.phpmyadmin.net/phpMyAdmin/4.8.2/phpMyAdmin-4.8.2-all-languages.zip
unzip phpMyAdmin-4.8.2-all-languages.zip
mv phpMyAdmin-4.8.2-all-languages phpMyAdmin
Now that you have downloaded phpMyAdmin you need to correct the permissions.
chown -R www-data:www-data /var/www/example.com/phpMyAdmin
chmod -R 655 /var/www/example.com/phpMyAdmin
Step 2 – Setup Nginx for phpMyAdmin
You have configured the permissions in step 1 and can move on with the next step and that’s configuring the Nginx configuration. You need to edit our Nginx configuration for your domain. Our Nginx config file is located at /etc/nginx/site-available/example.com
location /phpMyAdmin {
  root /var/www/example.com/;
  index index.php index.html index.htm;
  location ~ ^/phpMyAdmin/(.+.php)$ {
  try_files $uri =404;
  root /var/www/example.com/;
  fastcgi_param SCRIPT_FILENAME $document_root$fastcgi_script_name;
  include fastcgi_params;
  fastcgi_intercept_errors on;
  fastcgi_pass php;
}
location ~* ^/phpMyAdmin/(.+.(jpg|jpeg|gif|css|png|js|ico|html|xml|txt))$ {
  root /var/www/example.com/;
}
location /phpmyadmin {
  rewrite ^/* /phpMyAdmin last;
}
Step 3 – Restart Nginx
Once you have changed the Nginx configuration you should reload the Nginx to apply the changes. But before reloading, we recommend checking the Nginx configuration for errors. You can check this with the command below.
nginx -t
# nginx: the configuration file /etc/nginx/nginx.conf syntax is ok
# nginx: configuration file /etc/nginx/nginx.conf test is successful
If you have no errors in your configuration file you can apply the changes with reloading the Nginx.
systemctl reload nginx
Step 4 – Access phpMyAdmin
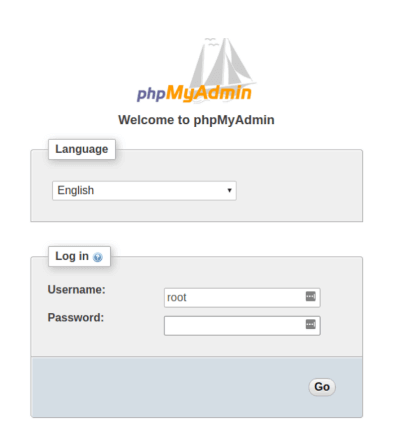
You can access your phpMyAdmin through your browsers by visiting https://www.example.com/phpMyAdmin

Congratulations, you successfully installed phpMyAdmin for your website.
Step 5 – Secure your phpMyAdmin
The phpMyAdmin environment is configured but you are not done yet. You need to add extra security measures to protect your phpMyAdmin environment.
You can start by enabling basic authentication for your phpMyAdmin environment. So start editing your Nginx configuration and you can add these two lines into the server block of your Nginx configuration file.
auth_basic"Login";
auth_basic_user_file/etc/nginx/.htpasswd;
Once you have added these lines to your configuration you need to create a user to access phpMyAdmin.
~ $ htpasswd /etc/nginx/.htpasswd exampleuser
New password:
Re-type new password:
Adding password for user exampleuser
You have created the username with a password. In order to enable the basic authentication for your visitors, you need to enable this within our Nginx configuration file. Add the following lines to your Nginx configuration above the basic authentication.
satisfy any;
allow 127.0.0.1
deny all;
You have changed the Nginx configuration and now you need to reload Nginx to apply to changes. But first, check the Nginx configuration for errors.
nginx -t # nginx: the configuration file /etc/nginx/nginx.conf syntax is ok
# nginx: configuration file /etc/nginx/nginx.conf test is successful
If you have no errors in your configuration file you can apply the changes with reloading the Nginx
systemctl reload nginx
Step 6 – Confirm the password authentication
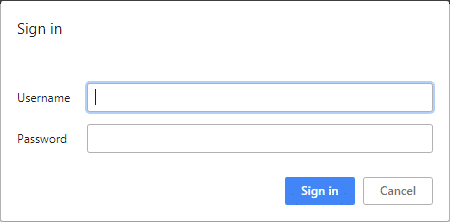
To confirm that your phpMyAdmin is protected you have to visit the website. If it is asking you to enter a username and password you can rest assured that the installation was successful.

Conclusion
You should now have a configured phpMyAdmin which is protected with Basic Authentication.


Leave a Reply