What is QUIC.cloud CDN
Content Delivery Networks (CDNs) are a great way to speed up your website and improve its performance. One popular CDN is QUIC.cloud, which uses the QUIC protocol to deliver content quickly. In this article, we’ll show you how to set up QUIC.cloud on your WordPress website.
This is how you set ip QUIC.cloud CDN on WordPress
Prerequisites
- Make sure you have LiteSpeed set up
- Have LiteSpeed Cache enabled in WordPress
Step 1: Create a QUIC.cloud Account
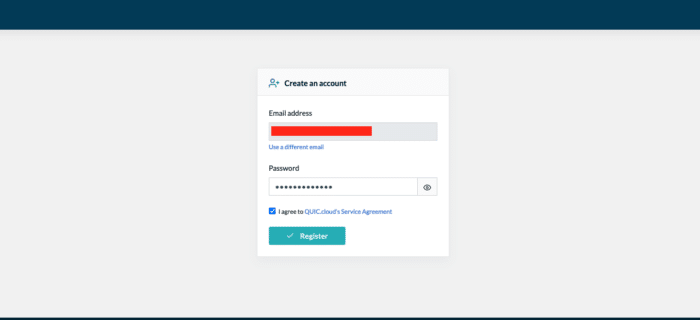
The first step in setting up quic.cloud is to create an account.
Go to the QUIC.cloud website and click the Sign Up button in the top right corner.

Fill out the registration form with your details and click the Create Account button.
Step 2: Request the domainkey of your website
It may seem scary, but it’s much easier than it looks.
You will need to either make or renew your domainkey, you can do this by going to LiteSpeed Cache > General settings > Domainkey.
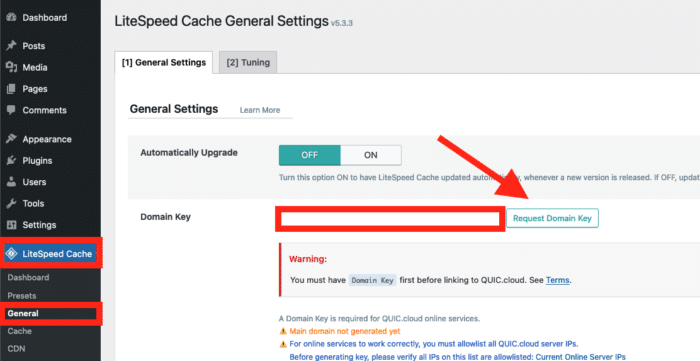
Once the domainkey has been made(or renewed) you can proceed to the next step.
Step 3: Link your website with QUIC.cloud CDN
So….what was the domainkey needed for then?
With the domainkey, you will be able to link QUIC.cloud with your website.
Right where the domainkey is, if you look to the right you will see a button that will display Link to QUIC.cloud, click on it.
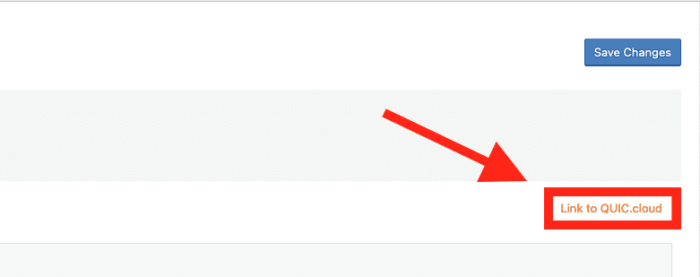
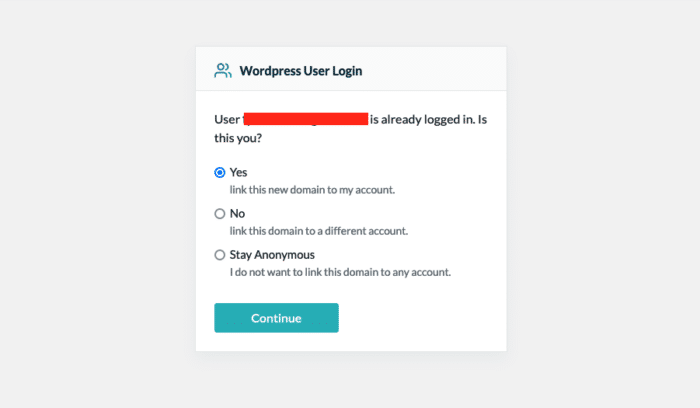
Once you click the button, you will be asked to log into QUIC.cloud, fill in your account details to link WordPress with QUIC.cloud.
Step 4: Enabling CDN
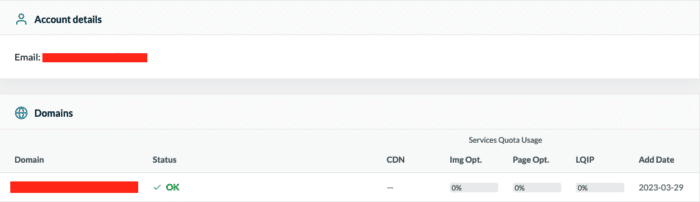
If done correctly, your website will now appear in QUIC.cloud’s control panel.
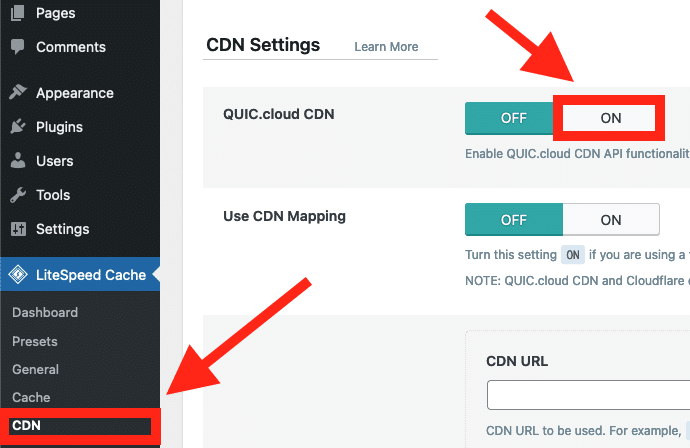
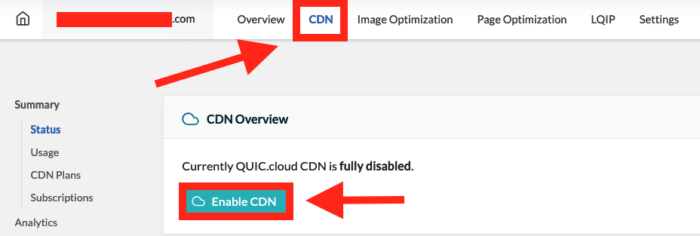
Now we have to enable CDN in 2 areas.
To begin, turn on the CDN feature in the LiteSpeed cache settings in WordPress by going to LiteSpeed Cache > CDN.
Then, turn on the CDN in the QUIC.cloud control panel by clicking on the enable CDN switch (locate your site in the overview, navigate to CDN, status, and click on Enable CDN).
Afterward, you’ll be presented with two options: use CNAME or use QUIC.cloud DNS for your main domain. Unless you’re familiar with DNS services and want to use them, choose the first option. Lastly, confirm your choice.
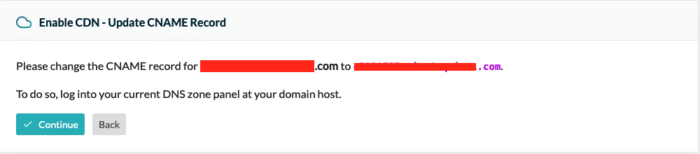
Step 5: Connecting your domain
After enabling the domain in your QUIC.cloud dashboard, you will receive a value that you need to set as a CNAME record in the DNS settings of your domain.
Note: Make sure you select the correct domain!!
Now you will need to make a CNAME record with the one that was provided in your QUIC.cloud dashboard.

After this is done, it will take about 20 min for the changes to take affect.
Congratulations! You have now set up QUIC.cloud for your WordPress website.
Conclusion:
Setting up QUIC.cloud on your WordPress website is a straightforward process. By following the steps outlined in this article, you can improve the performance of your website and provide a better experience for your visitors. Remember to keep your settings up to date and to monitor your website’s performance regularly.

Leave a Reply