Introduction
Whether you run applications or websites backups can make the difference between a big disaster and a minor inconvenience. Every day a large amount of data is produced, Data loss is, therefore the biggest risks for companies that depend on their data. Nevertheless, data backup is often overlooked. We recommend you to use Acronis Backup Cloud, which is a safe, scalable and hybrid backup solution.
This article describes how to set up Acronis Backup Cloud on a server with Plesk.
Prerequisites
- You need to have Plesk installed on your server.
- A VPS, Budget Dedicated Server or Dedicated Server running Plesk Obsidian control panel on CentOS 7
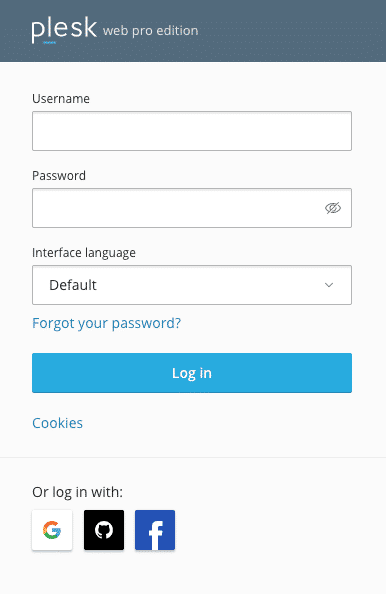
Step 1: Log in to Plesk
Log in to your Plesk environment https://plesk.example.com:8443
Step 2: Install Acronis Backup Extension
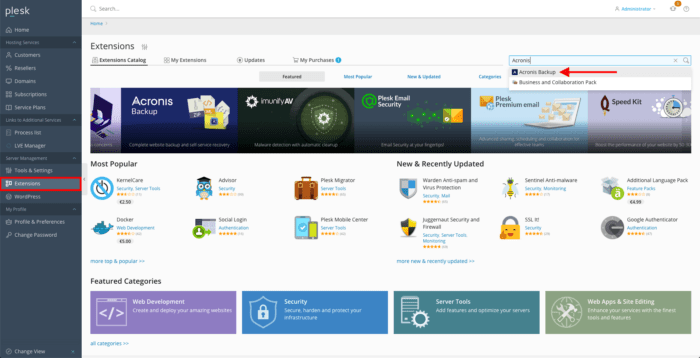
Go to Extensions and search for Acronis. The Extension we need is called Acronis Backup:
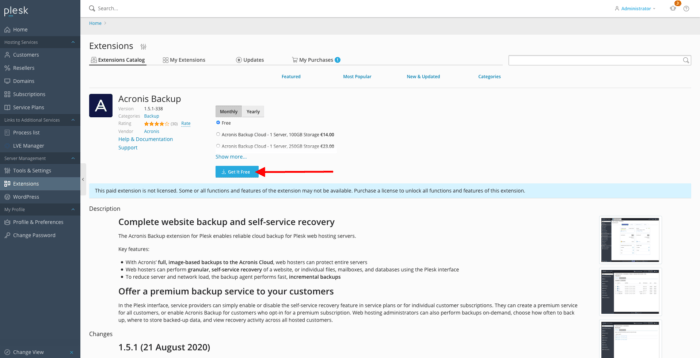
Install the Acronis Backup Extension:
Step 3: Setup Acronis Backup Cloud
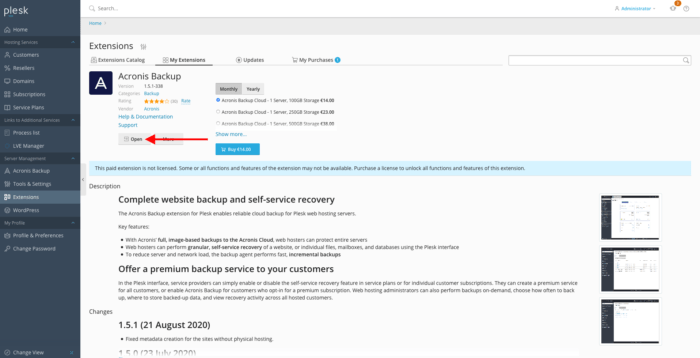
After installing the extension open the extension by clicking on “Extensions” followed by “Acronis Backup”:
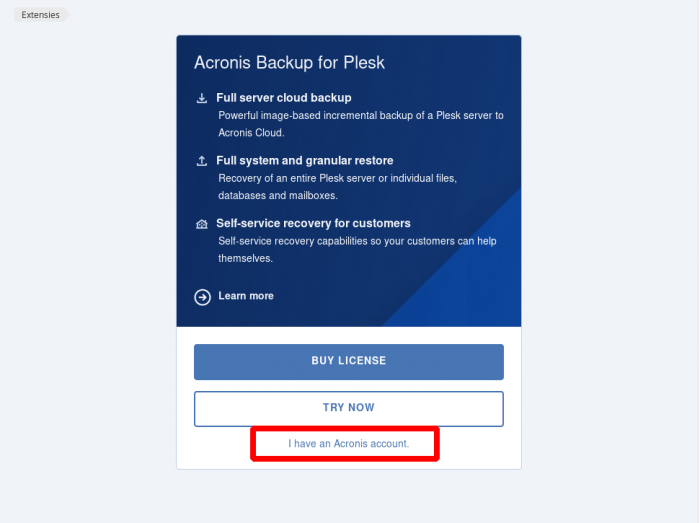
Upon starting for the first time you should click on I have an Acronis account:
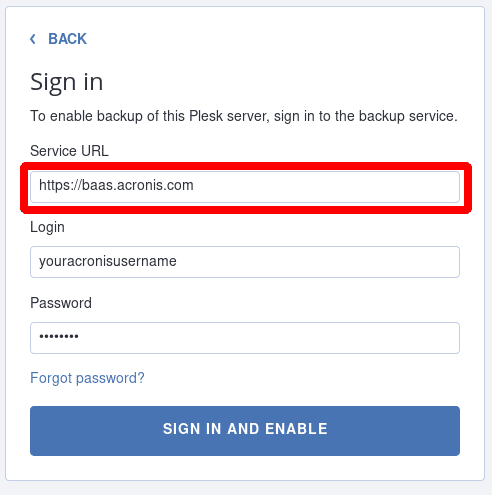
On the following screen, you should change the Service URL from https://cloud.acronis.com to https://baas.acronis.com and fill in your username and password:
Step 4: Acronis Backup login credentials
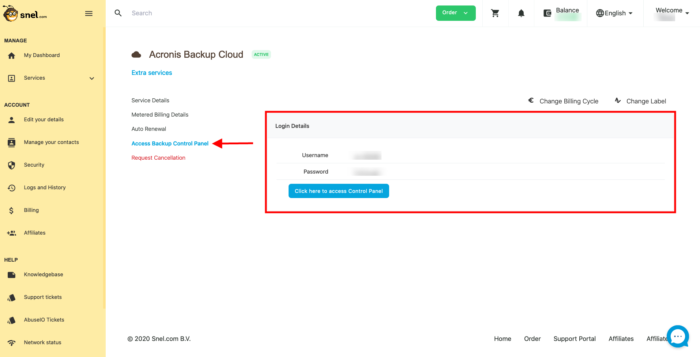
Log in to the client area and navigate to Services -> Extra services in the left sidebar menu. Open Acronis service by clicking on Acronis Backup Cloud. The login details can be found under Acronis Backup Cloud Panel:
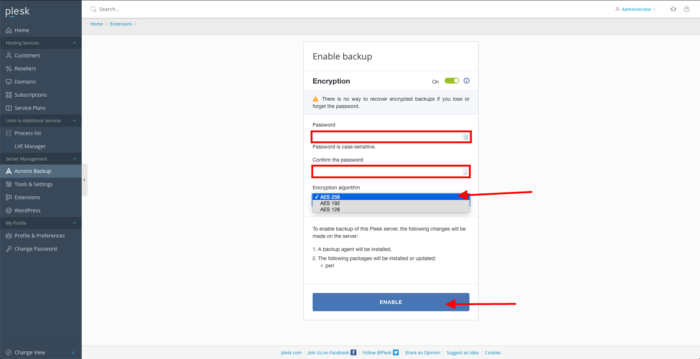
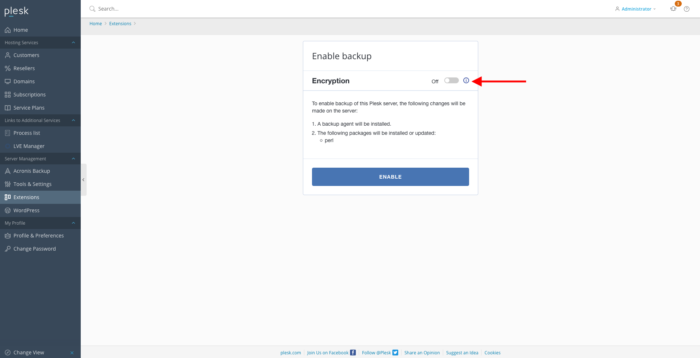
If you do not want to enable encryption you can keep the default configuration. Click on ENABLE
to proceed:
Step 5: Backup your server
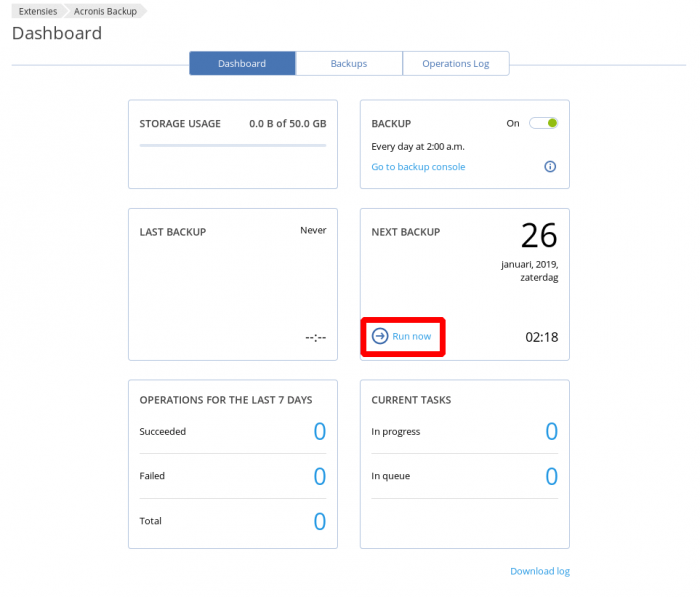
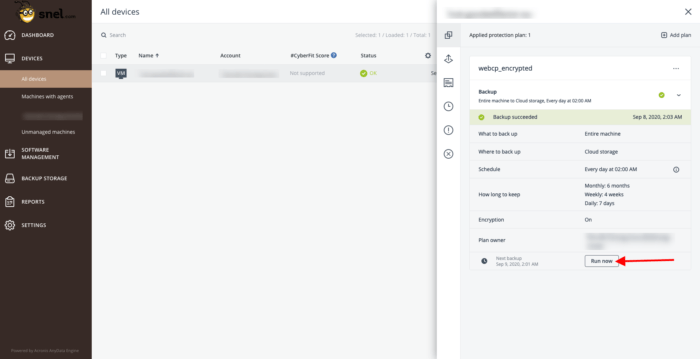
Afterward, you can run the backup immediately or let the schedule run the backup. To run the backup immediately click on Run now :
Step 6: Changing the backup schedule and retention
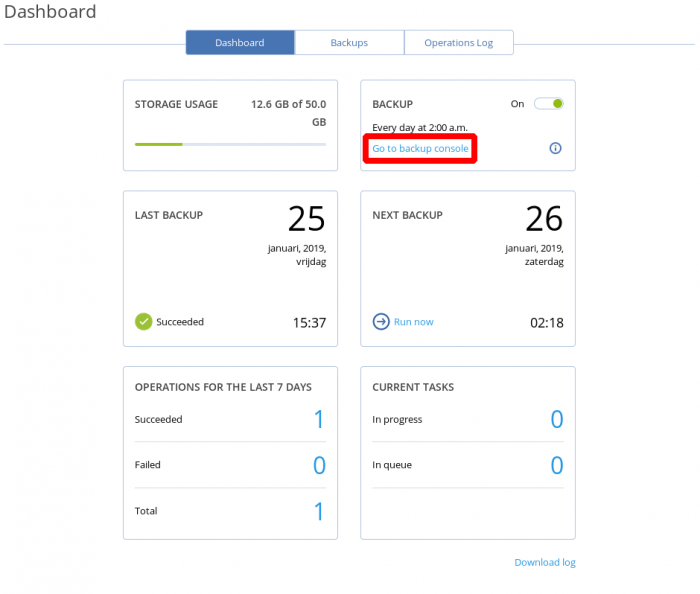
To change backup settings like when to create backups and how long to keep them you should click on Go to backup console. This will take you to the Acronis Backup Cloud Management Console:
If it’s your first time that you logged in to the Acronis Backup Cloud Management console it will ask you to accept the license agreement. To do so go to https://baas.acronis.com/ and log in with your username and password which you can find in the client area.
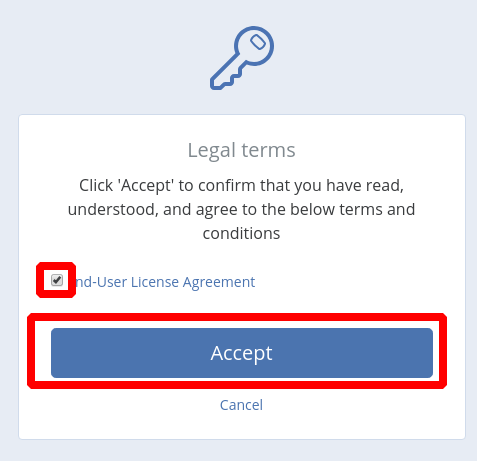
Mark the checkbox and click on Accept. Once you are successfully logged in to their client area you will see a list of your servers. Click on the appropriate server and click on Backup:
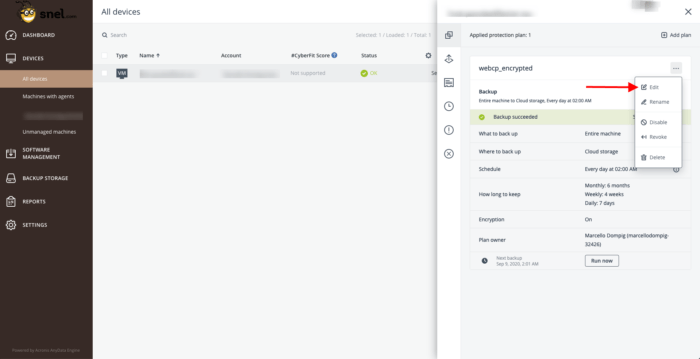
Click on the cog icon followed by “Edit”:
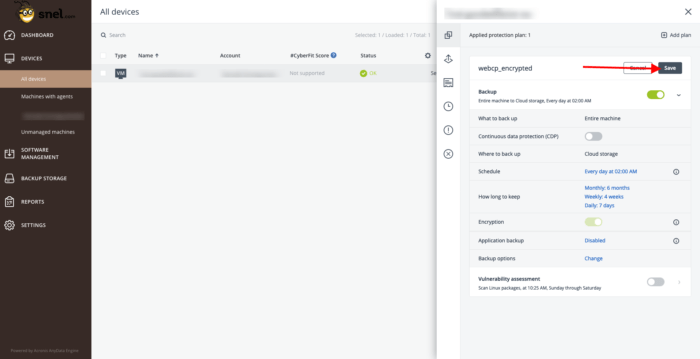
You can change the schedule and how long to keep backup settings according to your needs. Click on Save :
Conclusion
After following these instructions your Plesk server will have automatic scheduled backups with easy recovery options within the Plesk interface. Your end-users can restore their own backups which is a very nice addition to the already impressive options of Acronis Backup Cloud.



Leave a Reply