Introduction
How to recover your password on Windows Server 2019/2016/2012 R2. This tutorial is a step-by-step guide to unlock administrator account and reset password or clear it completely. This guide applies to:
- Windows Server 2019
- Windows Server 2016
- Windows Server 2012 r2
Notice: Before attempting any rescue, back up your VPS or dedicated server. Snel.com offers snapshots for VPS customers but make sure you have backups of your data before proceeding. Snel.com is not responsible for loss of data.
Step 1. Put your server into Recovery Mode
NOTE: The procedure for recovery mode for CloudVPS is bit different than for the dedicated servers.
Our Cloud VPS’s as wel as the dedicated servers have a recovery mode option which is available in your client area. Recovery mode is used for maintenance, recovery and testing purposes. For the purpose of this article we will describe how to set your server in recovery mode and use system rescue disc to recover or change your password.
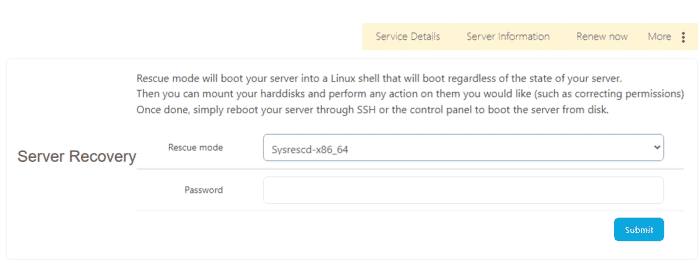
- Go to Services > select the server > More > Server Recovery
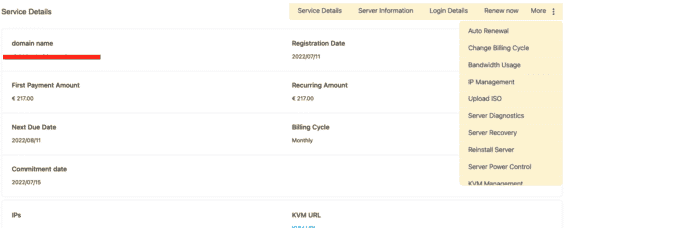
- Choose sysrescd-x86-64 from the dropdown menu and enter your server password.
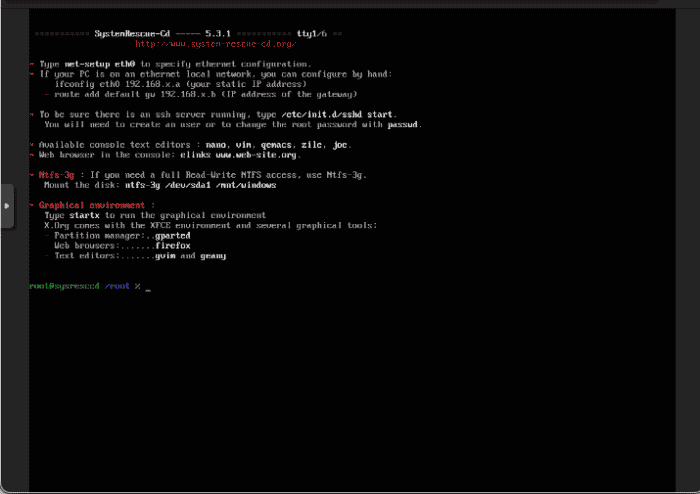
Step 2. Log in after enabling the recovery mode
The server will reboot to recovery mode. It may take a few moments for you to be able to view your instance console while the server reboots. The login method into your console depends on which of following 3 server types that you could be using:
In case you are using Cloud VPS follow these steps for KVM console
Dedicated servers with IDRAC console
Supermicro budget server KVM access
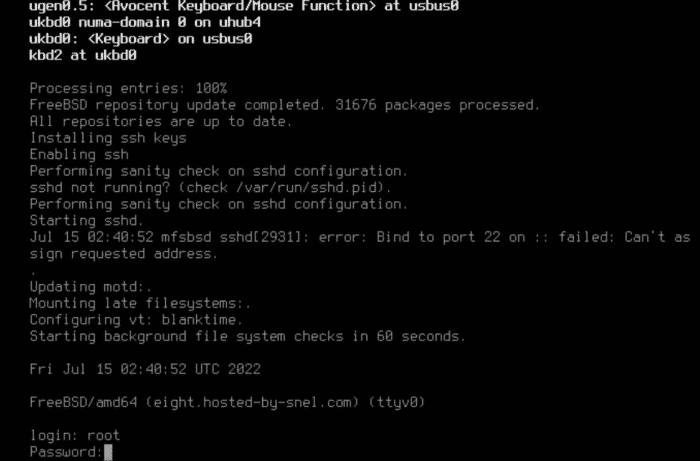
On dedicated server you will have to login through KVM and manually launch the console and log in as root (use the root password provided from the server details in your client area).
3. Mount the Windows Device
After we have set the server in the recovery mode and logged onto the console, let’s use the command prompt to enter the following command sequence:
- Locate the correct Windows device by typing the fdisk. Look for the main Windows system device. Normally, this will be the NTFS type device with a similar size to the VPS disk. For this tutorial, use /dev/sda2 but it can also be listed as vda2. In this case we have 2 partitions: sda1 and sda2. We can see that the sda1 is smaller one than the sda2 which means sda1 is our system partition and sda2 is our boot partition.
# fdisk -l

Device Boot Start End Sectors Size Id Type
/dev/sda1 * 2048 1126399 1124352 549M 7 HPFS/NTFS/exFAT
/dev/sda2 1126400 167770111 166643712 79.5G 7 HPFS/NTFS/exFAT
- Make a mount point folder.
# mkdir /mnt/win
- Attempt to mount the Windows system disk.
# mount /dev/sda2 /mnt/win
- If mount succeeded, skip to the next section. Mount might encounter errors if the system wasn’t shut down cleanly in step one.
The disk contains an unclean file system (0, 0). Metadata kept in Windows cache, refused to mount.
Falling back to read-only mount because the NTFS partition is in an unsafe state.
Please resume and shutdown Windows fully (no hibernation or fast restarting.)
- If mount encounters errors, as shown above, the Windows device will be mounted read-only. Before we can correct the error, unmount the drive.
# umount /dev/sda2
- With the drive unmounted, run ntfsfix to resolve the dirty shutdown error. Replace /dev/sda2 with your partition.
# ntfsfix /dev/sda2
... NTFS partition /dev/sda2 was processed successfully.
- After ntfsfix completes, attempt to mount the device.
# mount /dev/sda2 /mnt/win
5. Unlock the Account
- Navigate to the C:\Windows\System32\config folder, which is now mounted in SystemRescue under /mnt/win
# cd /mnt/win/Windows/System32/config/
- Launch chntpw in interactive mode, using the default Security Account Management (SAM) database
# chntpw -i SAM
1 - Edit user data and passwords
2 - List groups
    - - -
9 - Registry editor, now with full write support!
q - Quit (you will be asked if there is something to save)
- Enter 1 + ENTER to edit user passwords. A user list will appear.
| RID -|---------- Username ------------| Admin? |--Lock?--|
| 01f4 | Administrator                  | ADMIN  |dis/lock |
| 01f5 | Guest                          |        |dis/lock |
| 03e9 | client_24505_3                 | ADMIN  |dis/lock |
Please enter user number (RID) or 0 to exit: [03e9]
- Enter the RID number for the account you’d like to edit.
- - - - User Edit Menu:
1 - Clear (blank) user password
2 - Unlock and enable user account [seems unlocked already]
3 - Promote user (make user an administrator)
4 - Add user to a group
5 - Remove user from a group
q - Quit editing user, back to user select
Select: [q] > 1
- Choose an option from the menu. For this tutorial, choose 1 to clear the password.
Password cleared!
- Enter Q to exit the user menu.
- Enter Q to exit chntpw.
Hives that have changed:
# Name 0 <SAM> Write hive files? (y/n) [n] : y
- Enter Y to save the SAM hive.
6. Unmount the Windows Device
- Change to the root directory.
# cd /
- Unmount the Windows device.
# umount /mnt/win
7. Exit recovery mode and reboot
- Navigate to the Server Information page in the client area
- Select your Windows server > More
- Click on Disable recovery mode
- Wait for the server to reboot with default installed OS
8. Login and Set a Strong Password.
You must log in to the server through the web console (more information on VPS KVM, dedicated server IDRAC and budget server KVM console) from your dashboard to set a new password. Remote Desktop Protocol (RDP) does not allow login with blank passwords.
- Log in with your username, and leave the password field empty. The password reset procedure with SystemRescue completely removes the password.
- Click the Send CtrlAltDel button, located in the upper-right of the web console.
- Enter a new, strong password for your user account in Windows.
Conclusion
In this article we have provided a step by step guide on how to prepare the server for recovery mode and recover and/or change the password in VPS and dedicated Windows Server using the rescue disk.

Thanks