Install Custom ISO on your Dedicated Server
At Snel.com, you can install a custom operating system of your choice on your Dedicated Server. However, please note that customers are unable to upload ISO files themselves. To proceed, you must create a support ticket and provide us with a URL of the ISO file you wish to use. Our team will handle the upload for you.
In this tutorial, we will go through how to mount ISO into your server and boot from it using the KVM console of your Dedicated Server. We will also look at installing the OS through the console and detaching the ISO after installation.
Prerequisites
- An active Dedicated server.
- a direct URL of the ISO file available on the internet.
Step 1: Log in to your client area
Log in to your client area via https://my.snel.com/clientarea/.

Step 2: Select the server
Click on the server where you want to mount an ISO file.

Step 3:
Connect to your Dedicated Server using KVM Console
Click on more and select IPMI/BMC Console from the dropdown list.

Once you are successfully logged in, you will see the KVM Console for your Dedicated Server.
If you are getting any connecting issues while accessing the console, try again from another window or browser.
You will now navigate to the iDRAC interface.
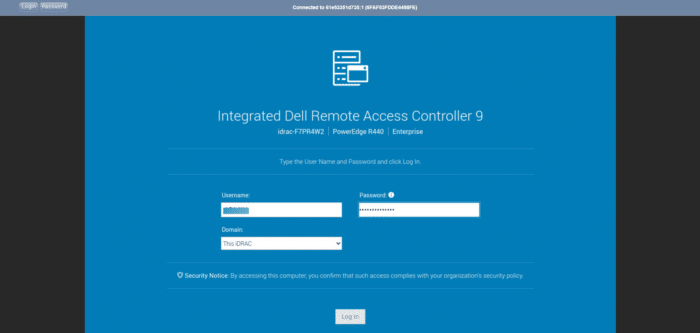
On the top left corner, click the login button which will autofill your username. Do the same for the password field while clicking the password button. (Make sure to place the cursor in the respective username and password fields when clicking the button)
Once the credentials have been filled, click Login at the bottom
Step 4: Mount the ISO to the Server
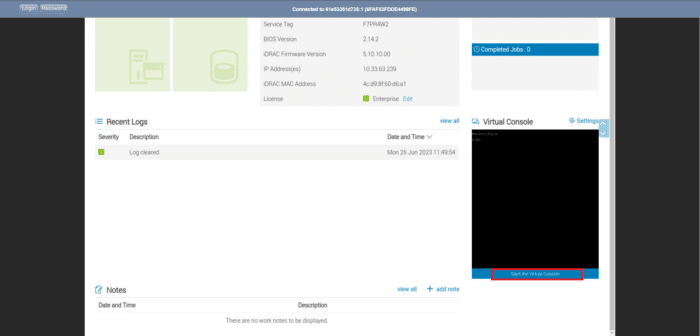
Scroll down and click Start the Virtual Console on the iDRAC dashboard
On Virtual Console, click on the button Connect Virtual Media from the top bar.
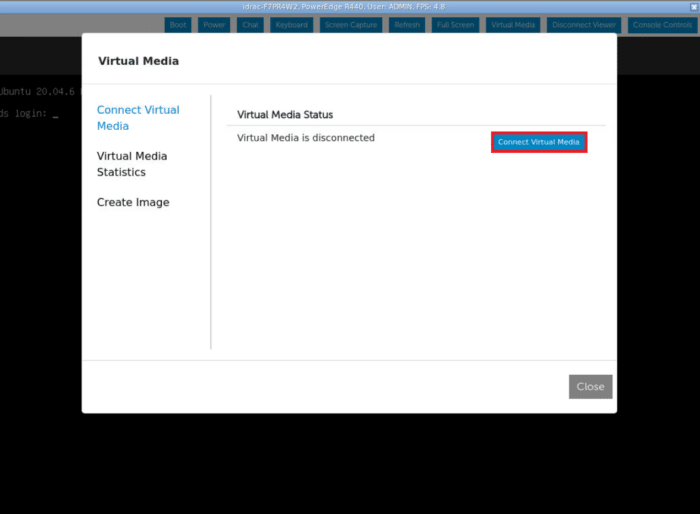 This will connect the Virtual Media Device to your server.
To mount the ISO file , click on Choose File on Map CD/DVD 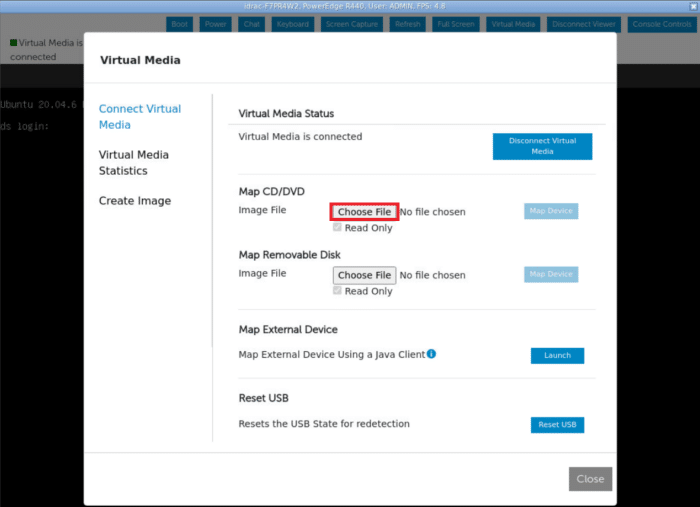
Select the desired OS from the list and Double click
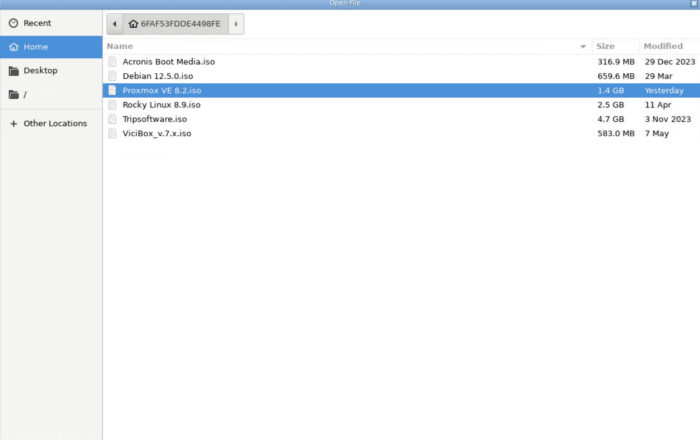
After selecting the ISO image file, click on the Map Device button to mount the Custom ISO as a Virtual Media device.

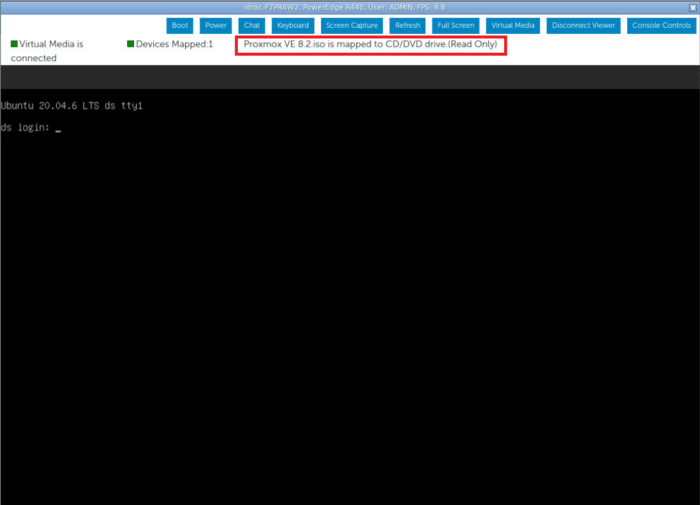
you should see the message on top saying your custom ISO is mapped to CD/DVD drive.
Step 5: Boot from Virtual CD/DVD
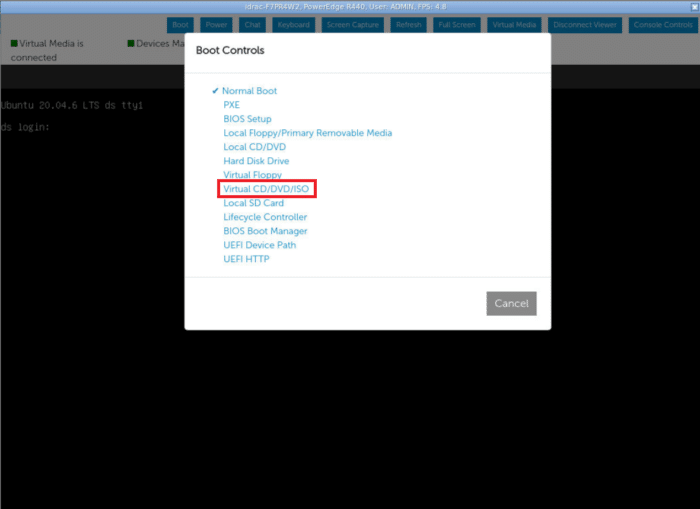
Since we have mounted the custom ISO, we can go ahead and boot from the Virtual CD/DVD. To do so, click on the Boot button on the top bar. This will open the pop-up for Boot Controls. Click on Virtual CD/DVD/ISO to set the boot control to boot from ISO.
Click Yes if it asks for any confirmation.
Now, click on the Power button on the top bar. It should open up the power menu. Click on Reset System(warm boot).
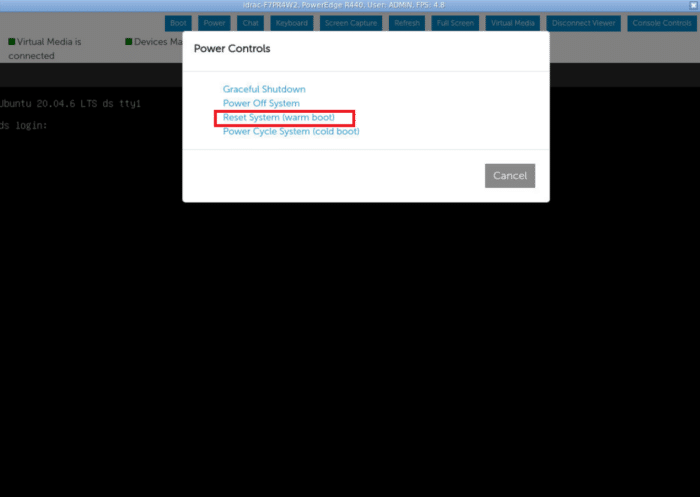
Click Yes if it asks for any confirmation. It should reboot your server and you should see that it is booting from Virtual CD.
Step 6: Install Operating System
Use the virtual console to install the operating system from the ISO. Since installation steps for every operating system vary individually hence it is not covered in this tutorial.
After operating system installation, if there is an automatic reboot, the server will boot from SSD Disk, not ISO image.
Step 7: Disconnect Virtual Media
Once you have successfully installed the operating system, you can remove the Virtual Media Device as it is no longer required.
Click on the Virtual Media button on the top bar. Now, click on the Disconnect Virtual Media button to disconnect. Click Yes if you get any confirmation prompt.
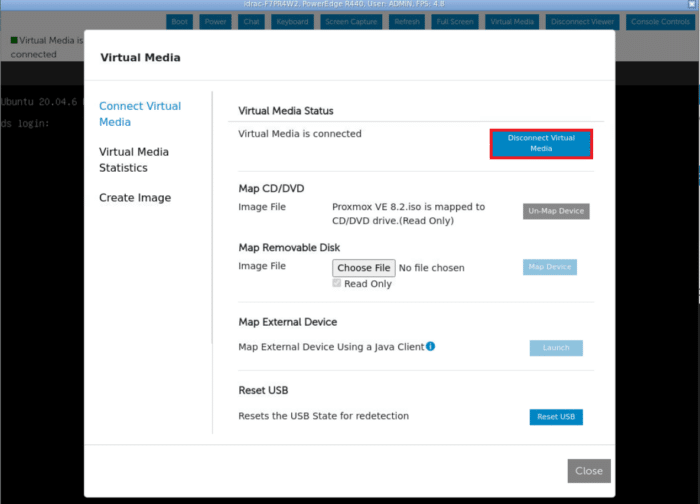
This will disconnect the Virtual Media Device and unmap the ISO image you had mapped.
Conclusion
Congratulations, you have installed a custom operating system on your Dedicated Server. In this tutorial, we have learned how to mount and install a custom operating system on Snel Dedicated Server. We looked at how to boot from ISO file using the KVM console. We also looked at installing the OS using the KVM console and detaching the Virtual Media Device after the installation.

Leave a Reply