Introduction
This article contains information about the migration from cPanel to the latest available DirectAdmin version. Follow all the steps of this article for a successful installation.
Prerequisites
- A server or VPS
- DirectAdmin version 1.57.4 or higher
- You need to have the SSH login details of your server ready with root or administrative user
- Installed software screen, rsync, nano
- DirectAdmin cpanel_to_da conversion script version 0.0.32 or higher
Step 1 – Log in using SSH to cPanel server
You must be logged in via SSH as sudo or root user. Please view this article for instructions if you don’t know how to connect with your server via SSH.
Step 2 – Prepare the cPanel server
Create a directory to store the cPanel user backups.
mkdir -p /home/all_backups
Find the max length of your cPanel users.
ls /var/cpanel/users | awk '{print length, $0}' | sort -nr | head -n1Output
16 abcdefghijklmnop
Step 3 – Log in using SSH to DirectAdmin server
You must be logged in via SSH as sudo or root user.
Step 4 – Prepare the DirectAdmin server
Create the directory.
mkdir -p /home/admin/all_backups
Change the directory owner to admin.
chown -R admin. /home/admin/all_backups
Install the converter script.
cd /usr/local/directadmin/custombuild
./build update
./build cpanel_to_da
Step 5 – Log in using SSH to cPanel server
We are using screen to prevent interruption due to network issues on the client.
screen -DR
Create user backup.
for user in `ls /var/cpanel/users/`; do { /scripts/pkgacct ${user} /home/all_backups; }; done!!! The backup name should be cpmove-user.tar.gz, backup-…._user.tar.gz will not work. If you have backup-…._user.tar.gz you can rename it with this
for i in `ls backup-[0-9]*.*.tar.gz`; do { USERNAME=`echo $i | cut -d_ -f3 | cut -d'.' -f1`; mv -v $i cpmove-${USERNAME}.tar.gz; }; doneTransfer /home/all_backups from cPanel to your DirectAdmin.
rsync -avt --delete /home/all_backups/ root@your_directadmin_server.com:/home/admin/all_backups/
Step 6 – Configure DirectAdmin configuration
In these steps, we will change the default DirectAdmin configuration to our needs.
Step 6.1 – Enable IPv6
Check if IPv6 is configured in your DirectAdmin configuration:
grep "ipv6" /usr/local/directadmin/conf/directadmin.conf
If there is no output we have to enable it.
echo "ipv6=1" >> /usr/local/directadmin/conf/directadmin.conf
Step 6.2 – Allow underscores in database name or database user
Enable underscores in database names and database users.
echo "allow_db_underscore=1" >> /usr/local/directadmin/conf/directadmin.conf
Step 6.3 – Change DirectAdmin username length
Default DirectAdmin settings for username length is 10. The allowed username length is based on the database version that you are using.
In our situation, we have to change the username length to 16 characters (step 2).
echo "max_username_length=16" >> /usr/local/directadmin/conf/directadmin.conf
Step 6.4 – Change DNS template (add 3rd nameserver)
DirectAdmin supports two nameservers by default. In order to add the third or more DNS servers to your DNS record, you have to make changes in your DirectAdmin configuration.
Add NS3 to your DNS configuration.
cd /usr/local/directadmin/data/templates/custom
cp ../dns_ns.conf .
Add the following line at the bottom of dns_ns.conf.
ns3.snel.com.=|DOMAIN|.
Step 6.5 – Configure the SPF record
Run the command below to configure the SPF record.
echo "extra_spf_value= include:_spf.smtprelay.snel.com" >> /usr/local/directadmin/conf/directadmin.conf
Step 6.6 – Restart DirectAdmin
Apply the changes by restarting DirectAdmin
systemctl restart directadmin
Step 7 – Restore the backups in DirectAdmin Web Interface
We will now restore the backups in the DirectAdmin Web Interface. Log in to your DirectAdmin web interface, for example: xxxx.directadmin.snel.com:2222
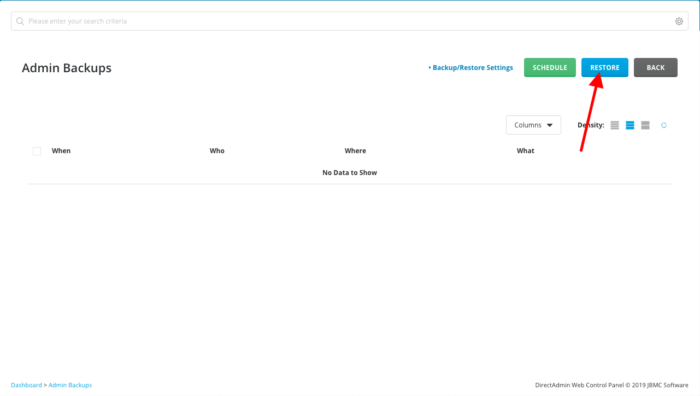
Navigate to Admin tools -> Admin Backup/Transfer

Click on Restore
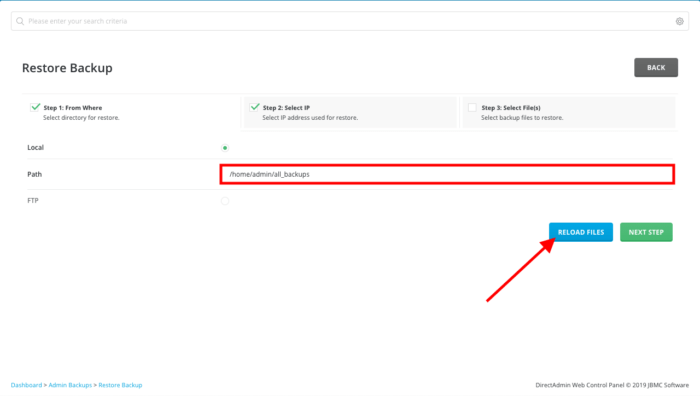
A new window will open. Change the path from /home/admin/admin_backups to the path that you have created in step 4 /home/snelcom/all_backups and click Reload Files.
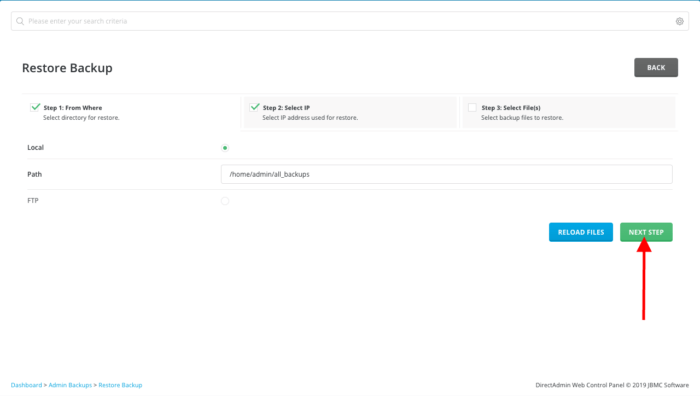
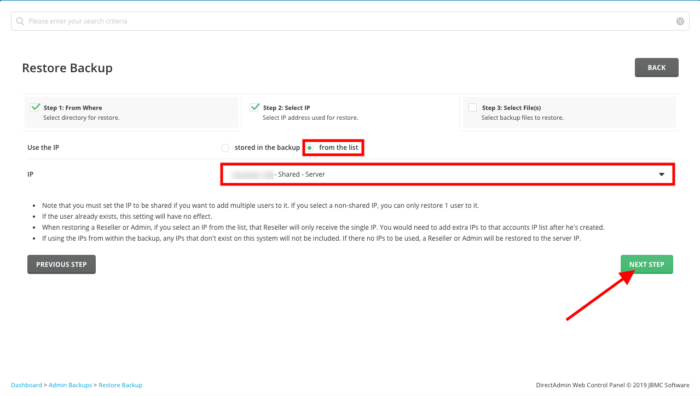
Once the files are reloaded click Next Step.
In step 2 you need to replace the IP addresses in the backup with the server IP address from the list and after that click Next Step.
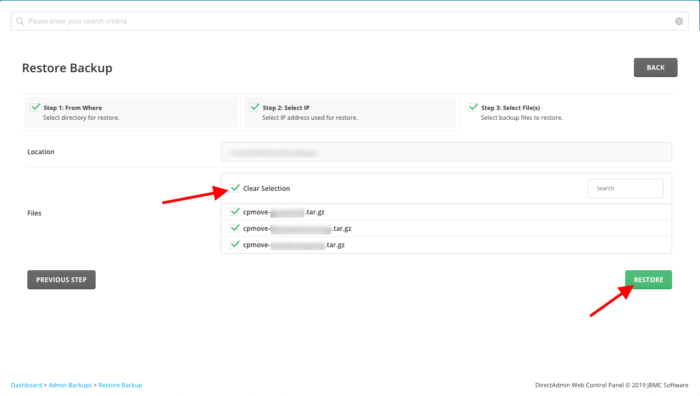
Select all backups that you want to restore from the list and click Restore.
A pop up will appear that the restore is added to the queue.

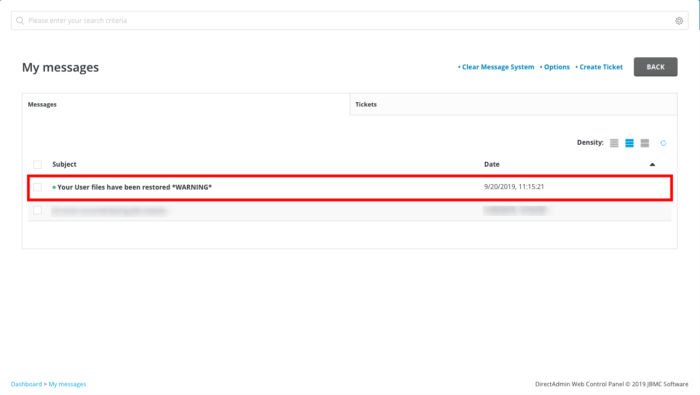
Once it’s finished you will see this in the message system of DirectAdmin.
Restore has finished with *WARNING*
Step 8 – Re-issue SSL certificates with Let’s Encrypt
In order to use the bulk re-issue of SSL certificated with Let’s Encrypt feature of DirectAdmin, you need the pre-release DirectAdmin binaries.
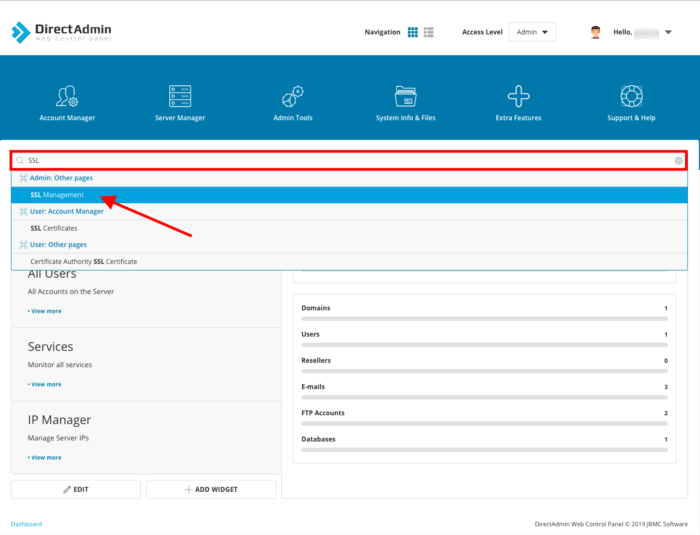
To use it, grab the pre-release DA binaries, and in the Evolution skin, go to:
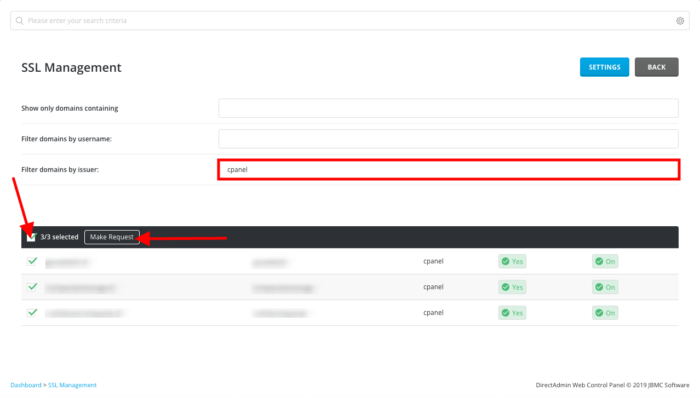
Type SSL in the search bar and click on SSL Management or replace the URL to http://directadmin.snel.com:2222/admin/ssl
Filter by issuer type cpanel in Filter domains by issuer:. Select all domain and click on Make Request.
Conclusion
Congratulations, you have migrated all cPanel users to DirectAdmin users.
Known issues:
*DirectAdmin format for MySQL usernames/databases
WARNING! account_wordpress cannot be owned by account, renaming database user to accoun_wordpress
Trying to find files in public_html to rename account_wordpress to accoun_wordpress. A copy of the file will have '.cpanel_backup_copy_dbname.php' appended at the end.
/home/admin/all_backups/account/domains/snel.com/public_html/wp-config.php
*User permissions issues on restored account
You can reset all secure_access_group permissions with:
echo "action=rewrite&value=secure_access_group" >> /usr/local/directadmin/data/task.queue
Once the secure access group has been reset, you need to change the permissions:
chown account_name:access /home/account_name
chmod 710 /home/account_name
*JetBackup format doesn’t include cpmove-user directory inside, we have to convert this manually. (would store converted backup in /home/admin/converted_user_backup):
jetbackup=yes /usr/local/directadmin/scripts/cpanel_to_da/cpanel_to_da.sh /home/admin/user_backups/cpmove-USERNAME.tar.gz /home/admin/converted_user_backup
chown -R admin. /home/admin/converted_user_backup




Leave a Reply