RAID Server
Our Dedicated Servers are delivered with Hardware RAID, we are using multiple disks rather than single disk solutions. This will provide speed, reliability and it also increases your storage capacity. Before you choose your server it is important for you to understand the different RAID levels. Each RAID level has its own characteristics. The one you should choose totally depends on whether you are using RAID for performance, fault tolerance or both. Below we will go through all the pros and cons of each RAID level and explain which type you should choose for different configurations.
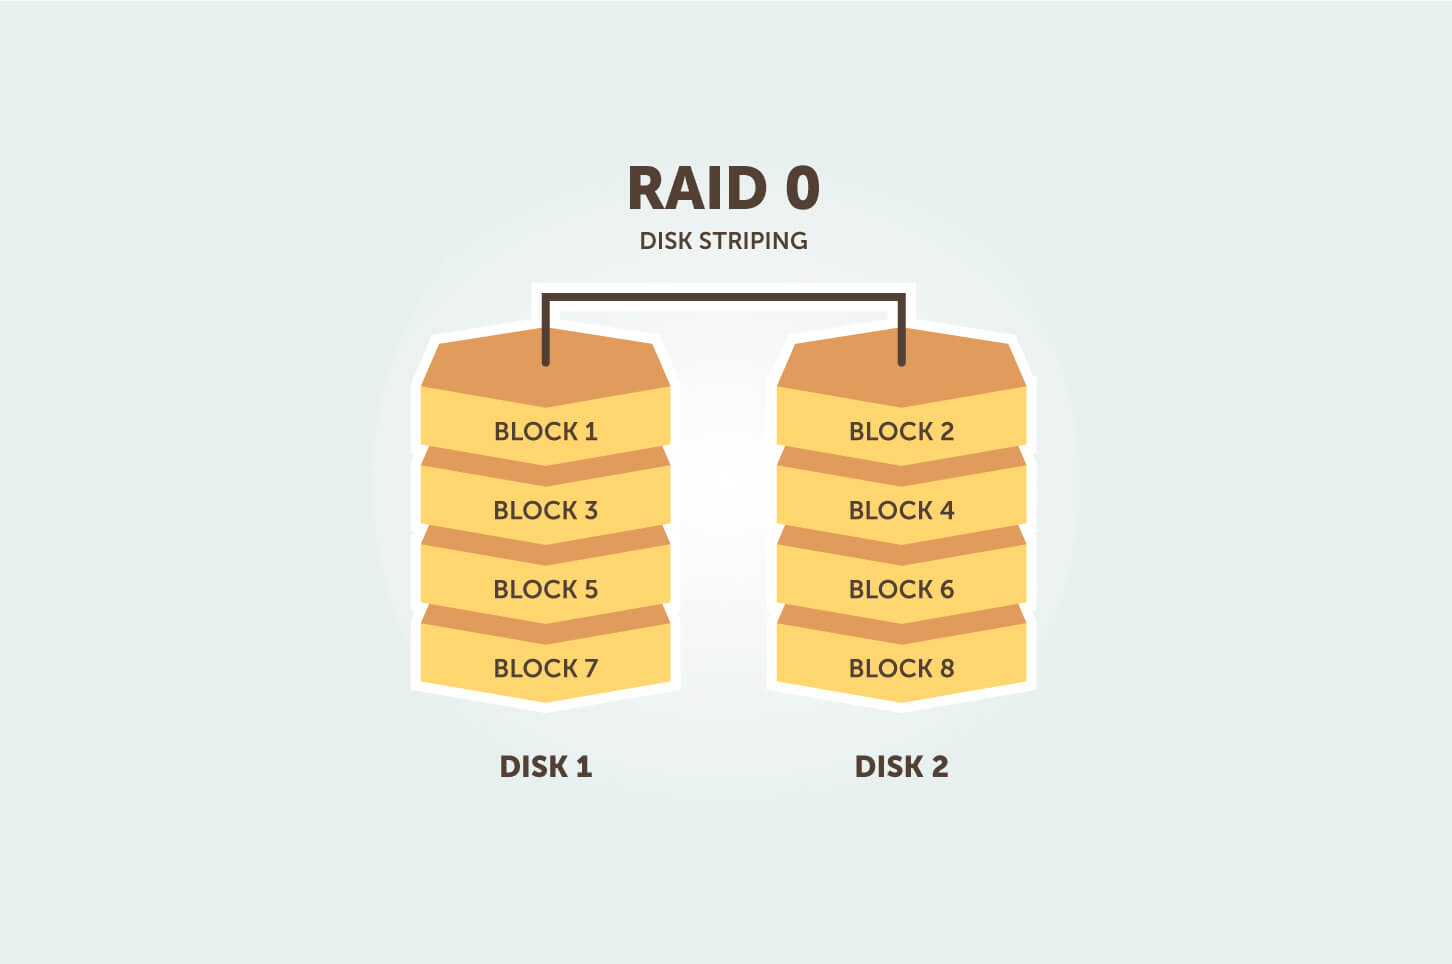
RAID 0: Speed
RAID 0 splits data across any number of disks allowing higher data throughput. It consists of striping without mirroring and parity. RAID 0 offers increased performance simply due to the fact that multiple drives are reading and writing data. However, there is no fault tolerance or any kind of redundancy which means that the entire array will be affected if one disk fails. This will result in data loss or corruption. RAID 0 is usually used for applications where speed and performance are very important. This setting has striping but no redundancy of data thus it offers high performance but no fault-tolerance.
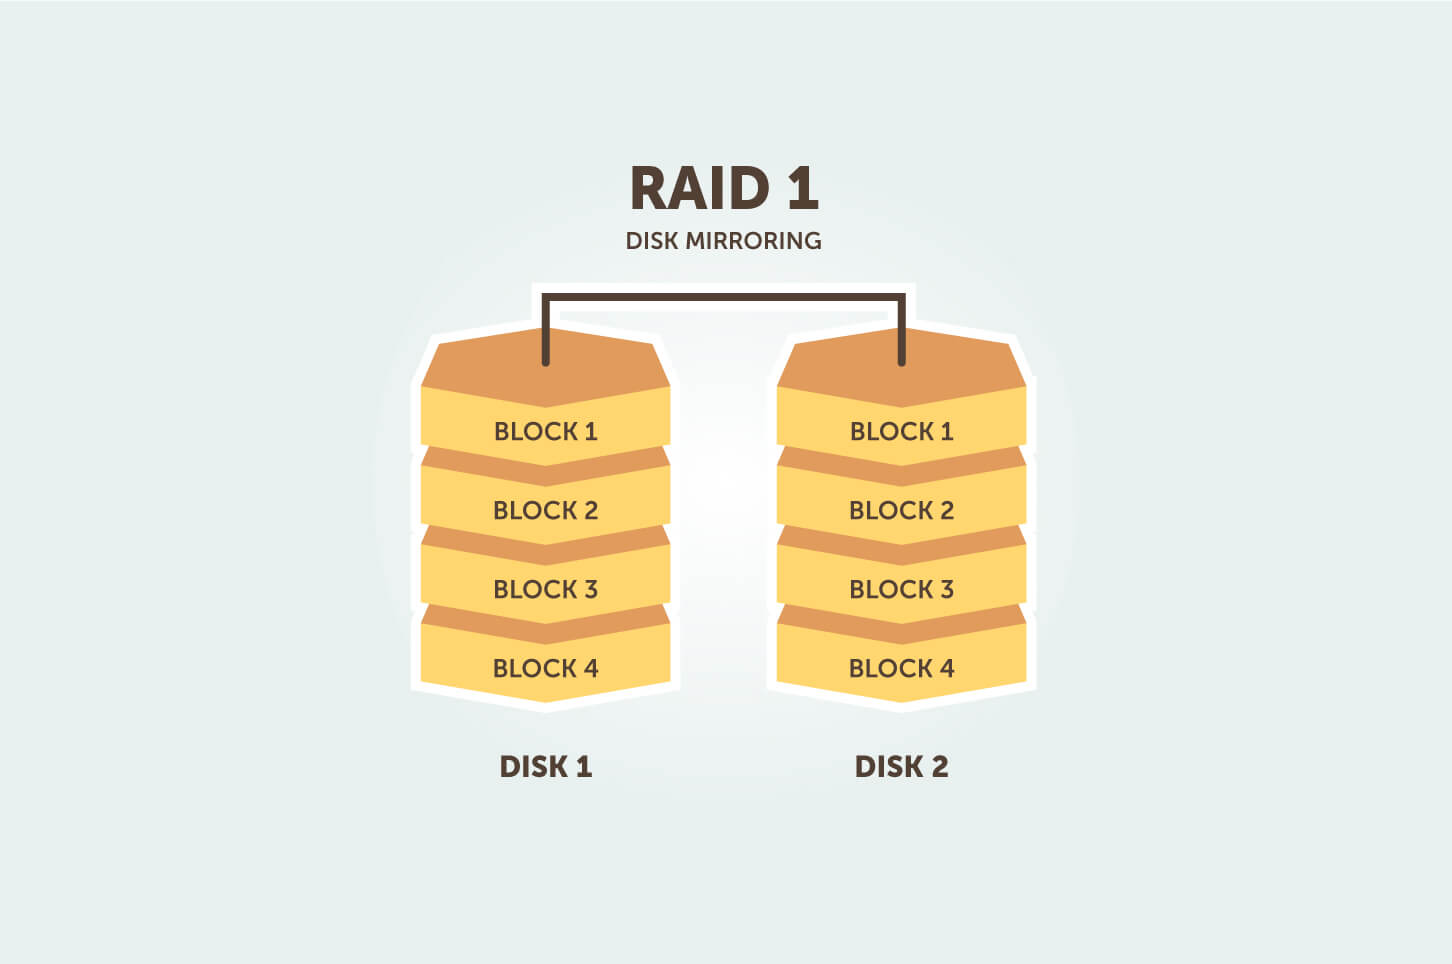
RAID 1: Safety First
RAID 1 is also known as disk mirroring. This configuration needs at least two drives that duplicate your data from one disk to another, creating a replica or mirror. There is no striping. Let’s say that you have a 10 GB file and you have a RAID 1 configuration, your file will be saved on the first and second drive. Your data will be available even when one disk gets fried, that’s why we can call this a safe or fault tolerance configuration. Read performance is improved since either disk can be read at the same time. RAID 1 can be implemented via software and hardware.
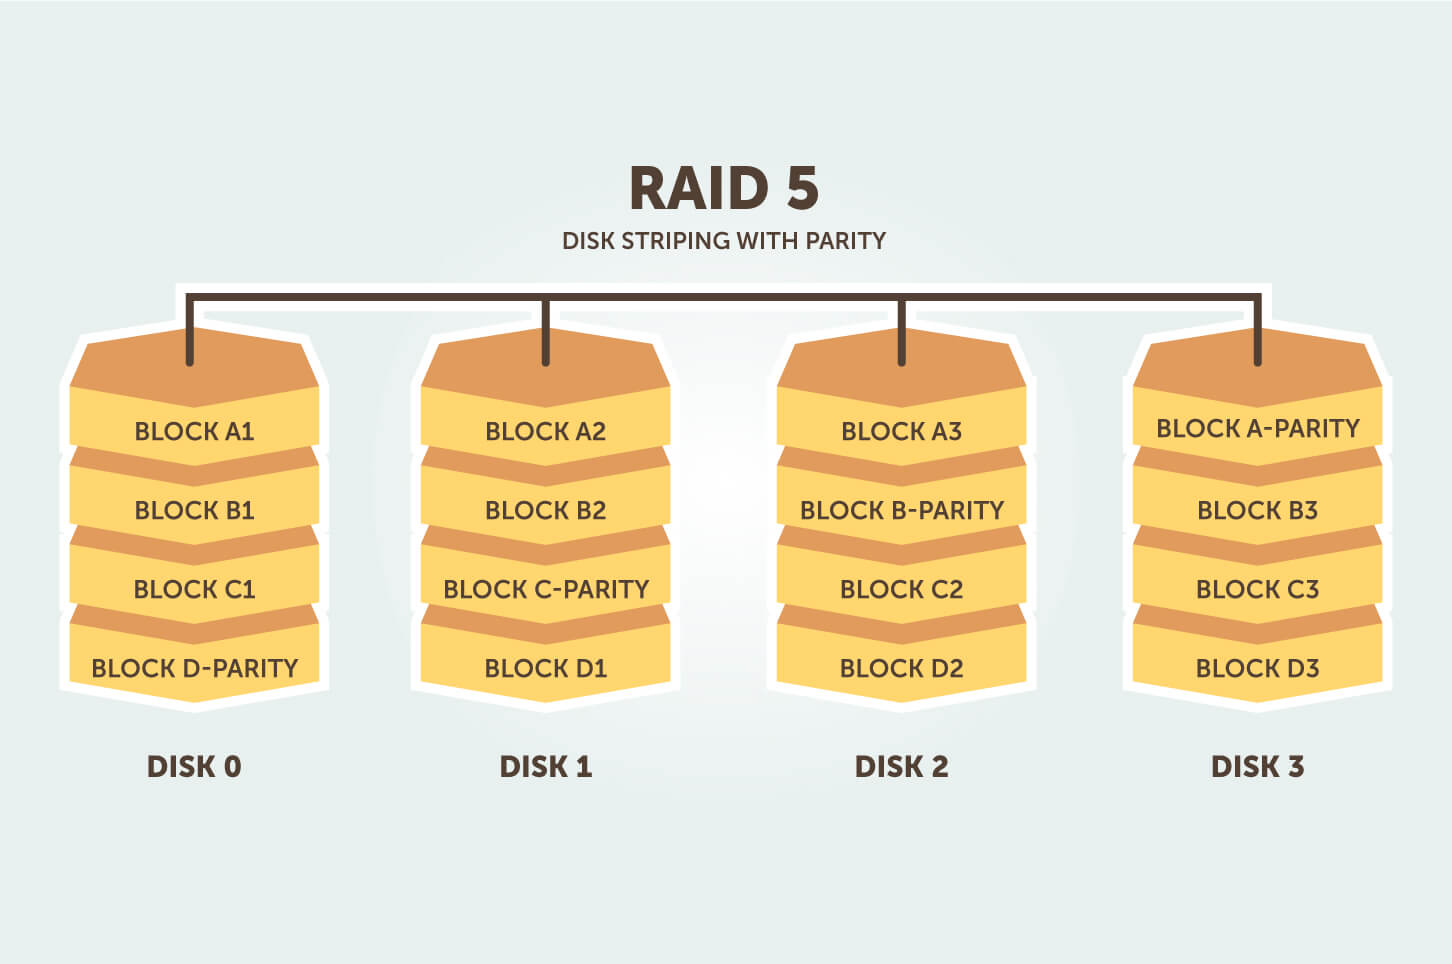
RAID 5: Looking for something between?
RAID 5 is a solution between RAID 0 and RAID 1. RAID 5 can be implemented with 3 to 16 disks. However, for optimal redundancy we do recommend a 3+1 configuration. With this configuration one disk is used for storing parity data for every 3 disks that are used in the RAID configuration. This configuration is just as safe as RAID 1. Unlike RAID 1 you will only use the capacity of one drive so for example if you have 3 disks you will only use 33% of the disk space and if you have 4 disks you will use 25% and so on.
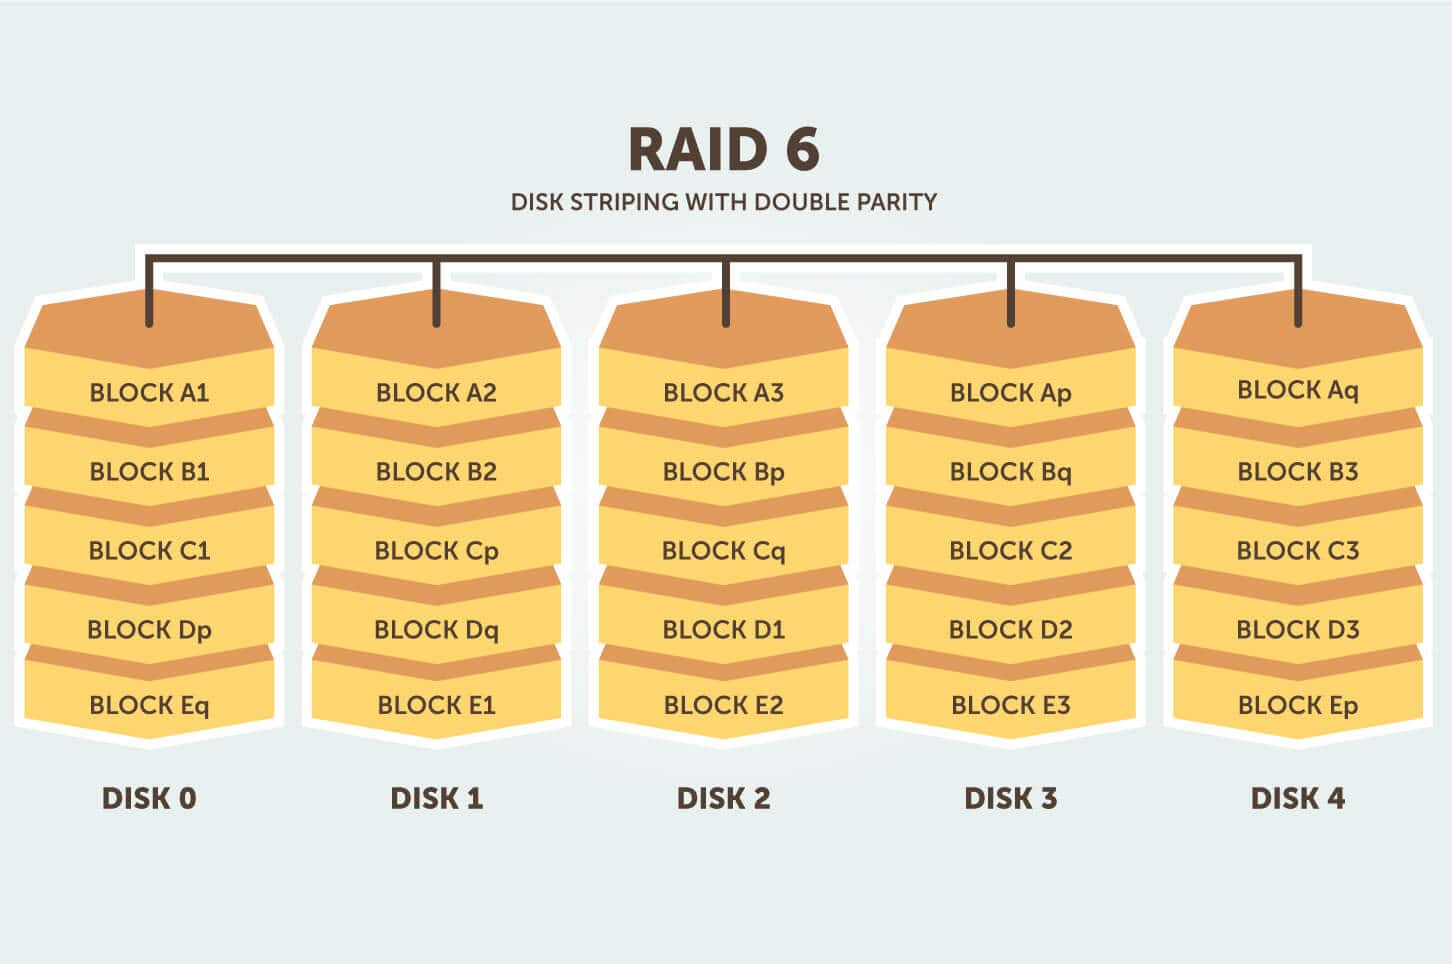
RAID 6: Similar to RAID level 5
The technique of RAID 6 is similar to RAID level 5 but it allows extra fault tolerance. The use of additional parity allows the array to continue to function even if two disks fail. This configuration needs at least 4 disks since the parity data are written to two disks.
Like mentioned earlier, if two drives fail you will still have access to all of your data even when the failed drives are being replaced so we can call it more secure than a RAID 5 configuration.
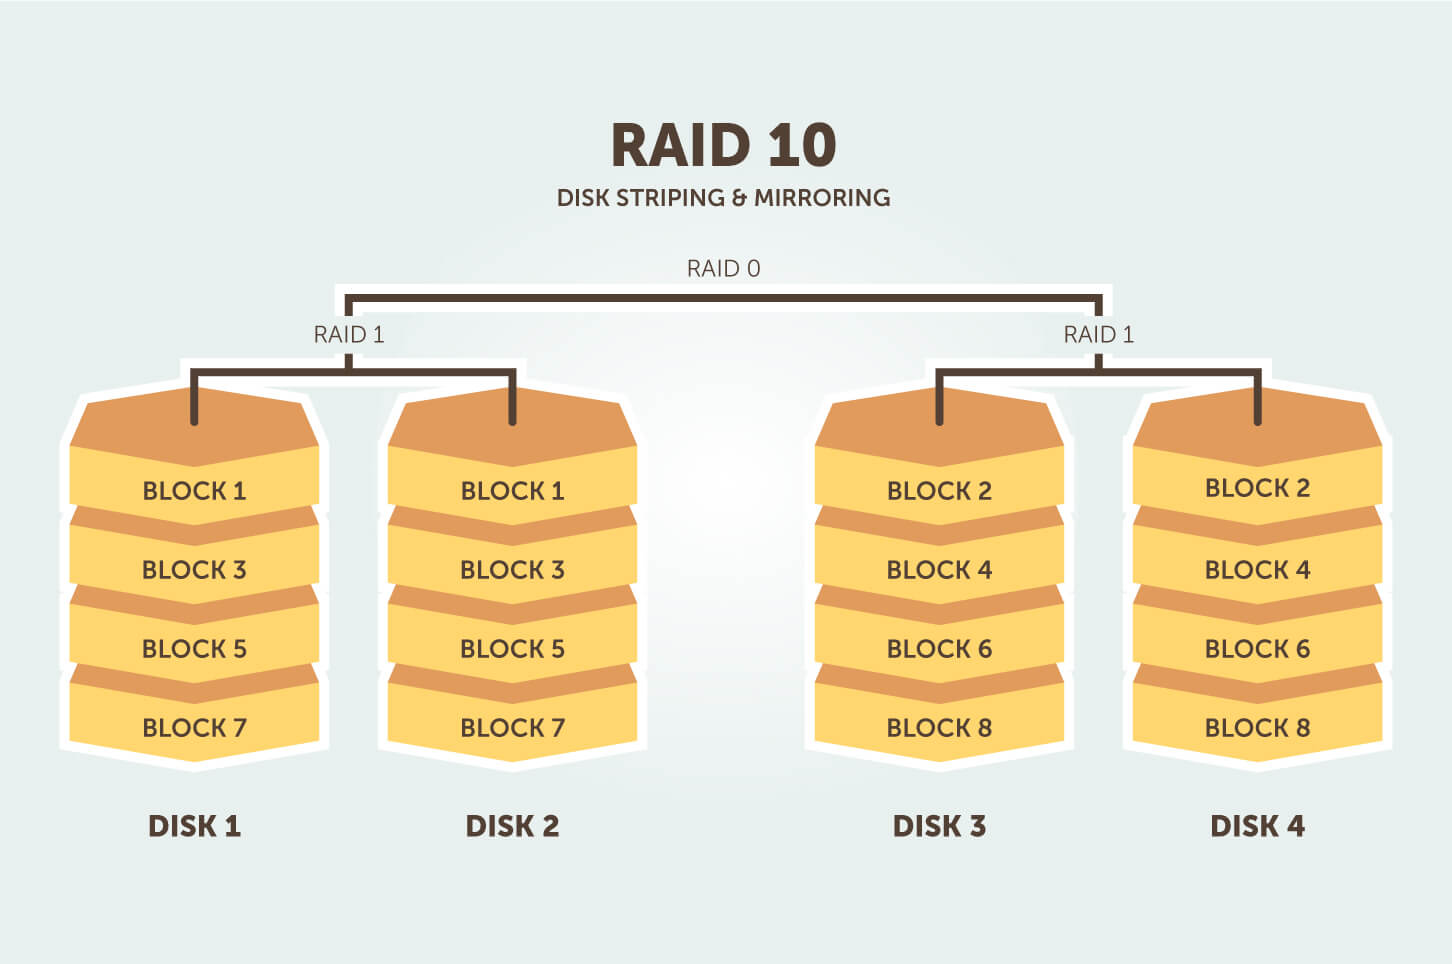
RAID 10 Striping + Mirroring
RAID 10 combines the mirroring of RAID 1 with the striping of RAID 0. In other words, it combines the redundancy of RAID 1 with the increased performance of RAID 0. With RAID 10 half the array capacity is used to maintain fault tolerance. If you combine 4x 500 GB drives in RAID 10, you will get 1000 GB of usable disk space. RAID 10 is a good choice for applications where both high performance and security is required.


