Introduction
In this tutorial, you will learn the procedure of TLS/SSL certificate installation on Apache webserver running on Centos 7. Once you are finished, all traffic between the server and client will be encrypted and safe. This is a standard practice of securing e-commerce websites and other financial services online.
Prerequisites
Before you begin working with this guide you’ll need these:
- SSH with Root user access to your CentOS 7 VPS
- The Apache web server with properly a domain and vhost configure
Step 1: Installing dependent modules
After ssh as root to the CentOS VPS, you need to install certbot so you will have to install EPEL repository as it’s not available by default and the mod_ssl module is a must for the encryption to be recognized in Apache.
To install both these dependencies, please run this command:
yum install epel-release mod_ssl
Now you should be ready to proceed further and install the certbot itself.
Step 2: Downloading the Let’s Encrypt client
To install the certbot client from EPEL repository run this:
yum install python-certbot-apache
Within a few times, the certbot should be installed and available for actual use.
Step 3: Create and install the SSL certificate(s)
Certbot will handle the SSL certificate management quite easily, it will generate a new certificate for a provided domain as a parameter.
In this case, example.com will be used as the domain for which the certificate will be issued:
certbot --apache -d example.com
If you want to generate SSL for multiple domains or subdomains, please run this command:
certbot --apache -d example.com -d www.example.com
IMPORTANT! The first domain should be your base domain, in this sample it’s example.com
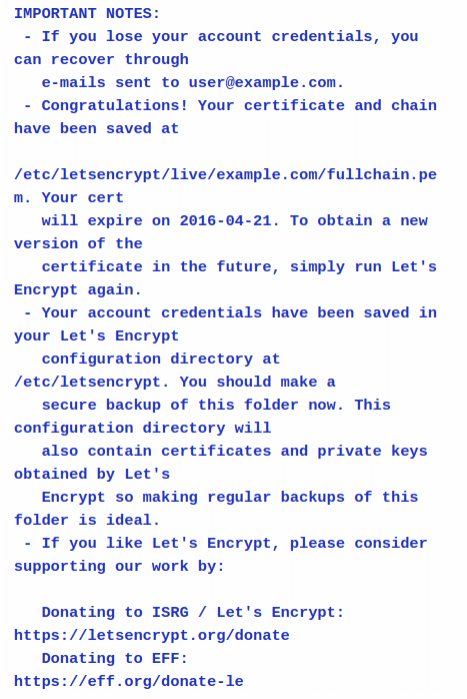
While installing the certificate you will be presented with a step-by-step guide which will let you customize certificate details. You will be able to choose between forcing https or leaving HTTP as the default protocol, providing an email address will be required as well for security purposes.
Once the installation completes, you should be presented with a similar message:
Step 4: Setting up for the auto-renewal
Let’s Encrypt certificates are valid for 90 days only, but every web professionals will recommend you to renew it within 75 days in order to avoid any issues. To accomplish this, the certbot will help us with its renew command. It will check if the certificate is less than 15 days away from expiration.
Please run this command to proceed:
certbot renew
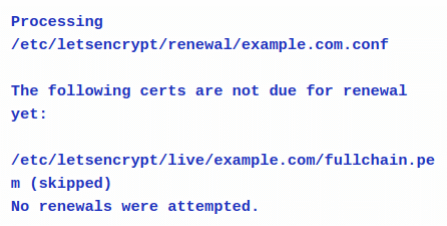
If the installed certificate is recent, the certbot will only check for its expiration date:
To automate this renewal process you could setup a cronjob. First, you need to open and edit the crontab by running:
crontab -e
This job can be safely scheduled to run every Monday at midnight:
0 0 * * 1 /usr/bin/certbot renew >> /var/log/sslrenew.log
The output of the script will be piped to /var/log/sslrenew.log file.
Conclusion
Congratulations, you have just secured your Apache web server by implementing the most anticipated security feature – free SSL certificates! From now on all traffic between your domain webserver and client is secure, you can be assured that no one could intercept the communication and alter or steal crucial information.


Leave a Reply