Setting up a VPN with PPTP (Point-to-Point Tunneling Protocol) is a common way to set up a basic private network. In this tutorial, we’ll show you how to get a simple VPN going with your hosted server using PPTP.
PPTP is a protocol that allows any computer or mobile device to connect to a VPN server and forward traffic through it. Although it’s old and relatively insecure, it’s still useful as a quick way to get a VPN up and running as long as you’re not sending secret information over the connection. PPTP operates on TCP port 1723.
Prerequisites for VPN with PPTP
We’ll be using Ubuntu 16.04 as the operating system for the VPN software. Follow the initial setup directions to install Ubuntu 16.04 on your VPS, and make sure you have access to the machine via a working SSH connection. For the following commands to work, you’ll also need to be running as the root user.
Initial Setup
First, we’ll need to install and configure PPTPd. This is the VPN software we’ll use to manage the VPN connection and to install it you just run the following in the terminal:
sudo apt-get install pptpdThe software needs some additional configuration: first, in /etc/pptpd.conf, you need to add lines for your local and remote ips. Those lines should look like:
# Server IP in local network localip 192.168.1.2 # IP address ranges used to assign IPs to new connecting clients # Here we define two ranges for our 192.168.1.* subnet: 234-238 and 245 remoteip 192.168.1.234-238,192.168.1.245After that, you’ll need to add DNS servers. Cloudflare’s public DNS server, at 1.1.1.1 is a good choice as it’s free and fast, but you can use any available DNS server. Just add ms-dns 1.1.1.1 as the last line of /etc/ppp/pptpd-options
Finally, you’ll need to add a username and password. Edit the /etc/ppp/chap-secrets file and add a line like:
# client server secret IP addresses testUser pptpd badpass *To test that everything’s good to go on the server side, run service pptpd restart to make sure the new settings take effect.
Firewall Configuration
In the initial setup, we tweaked some Ubuntu settings to allow SSH from OpenSSH. Now we have to make additional openings in the firewall to allow PPTPd to accept incoming connections on TCP port 1723, the port the PPTP protocol uses. We’ll do that by editing the UFW config.
First, edit the default policy in /etc/default/ufw to make it accept traffic by default. To do this, change the line with forward policy to read DEFAULT_FORWARD_POLICY=”ACCEPT”
Next, we’ll make some changes in /etc/ufw/before.rules. First, at the top of the file add the following lines:
# nat Table rules *nat :POSTROUTING ACCEPT [0:0] # Allow traffic from clients to eth0 -A POSTROUTING -s 192.168.1.0/24 -o eth0 -j MASQUERADE # commit to apply changes COMMITSecond, because of a conflict with the Linux kernel and PPTP security, you’ll need to edit the rules for accepting packets. Add the following line in the same file (before.rules) immediately after the line that says #drop invalid packets
Finally, we need to allow the port that PPTP runs on by entering ufw allow 1723 and follow it up by running ufw reload to ensure the changes take.
From here, you should have a working PPTP server that accepts incoming traffic from your client. If you have trouble getting set up, a useful debugging step is to enable debug logging in /etc/pptpd.conf. To toggle logging, find the line with “nolog” on it. If the line is removed, you can see PPTPd logging incoming connections in the /var/log/syslog log file. This should give you an indication of whether the problem is the client or the server.
Client Configuration
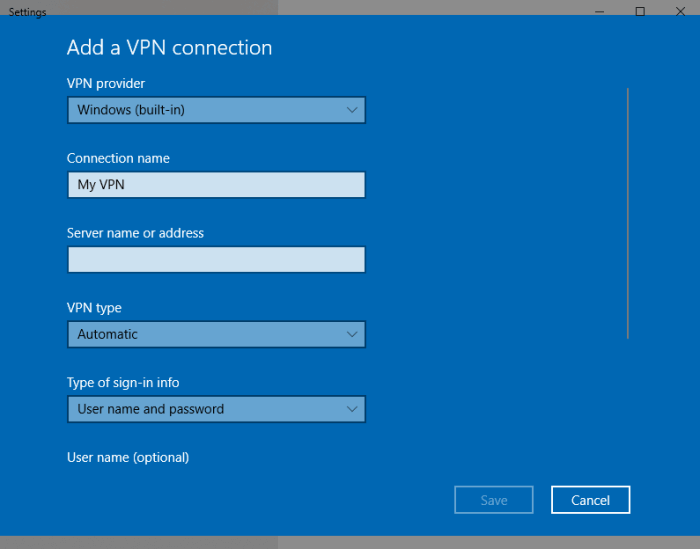
Here, we’ll quickly go through the steps of setting up a PPTP connection on a Windows machine. First, click the Windows button and type “VPN” to get to the VPN setup screen. Give the connection a name, and add the public IPv4 address of the server you configured. Automatic network type detection works for PPTP, so you can click through next and Windows will configure for you. If it doesn’t work for some reason, you can choose the protocol in the “VPN Type” drop-down.

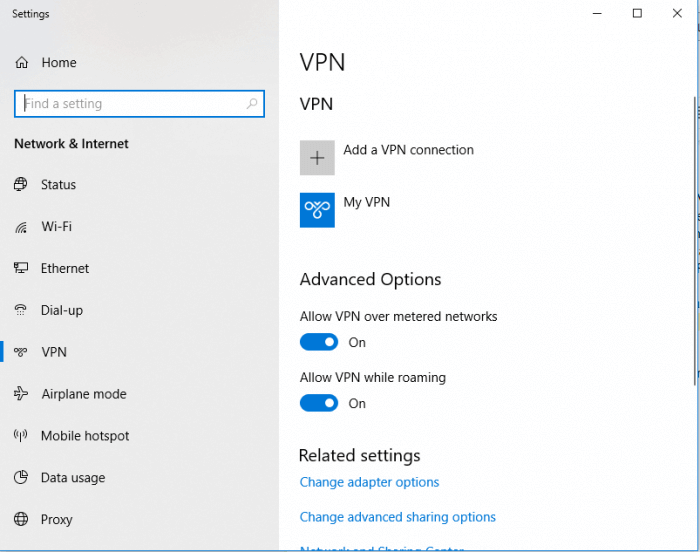
After that’s ready, click “Save”, then enter the username and password you configured above. One last click on save, and you’re ready to go! You should see the VPN name you chose in the network tab on the Windows menu.

Congratulations! You’ve successfully configured the server and client side of your VPN using PPTP! Just to make sure, you can navigate to a website to check your IP. Visit one, like this IP checker, and it will tell you where in the world it thinks you live. If the VPN settings are correct, it should give you the wrong address: it will tell you that you live where the VPN server is located, not at your real address.


Leave a Reply