Introduction
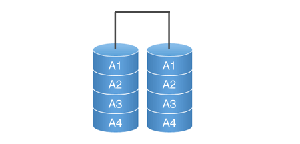
MDADM is the modern tool most Linux distributions use these days to manage software RAID arrays; in the past RAIDtools was the tool we have used for this. This cheat sheet will show the most common usages of MDADM to manage software raid arrays; it assumes you have a good understanding of software RAID and Linux in general, and it will just explain the commands line usage of MDADM. The examples bellow use RAID1, but they can be adapted for any RAID level the Linux kernel driver supports.
Prerequisites
- An active server
- Present Software RAID array
IMPORTANT NOTICE : Before you start with RAID management, make sure that you have a backup of your entire server in case something goes wrong. Snel.com is not responsible for any loss nor damage on your server while performing these procedures.
Explanation use MDADM to manage software RAID
1. Create a new RAID array
Create (mdadm --create) is used to create a new array:
mdadm --create --verbose /dev/md0 --level=1 /dev/sda1 /dev/sdb2
or using the compact notation:
mdadm -Cv /dev/md0 -l1 -n2 /dev/sd[ab]1
2. Configure MDADM
/etc/mdadm.conf or /etc/mdadm/mdadm.conf (on debian) is the main configuration file for MDADM. After we create our RAID arrays we add them to this file using:
mdadm --detail --scan >> /etc/mdadm.confor on Debian
mdadm --detail --scan >> /etc/mdadm/mdadm.conf3. Remove a disk from an array.
We can’t remove a disk directly from the array, unless it is failed. (if the drive it is failed this is normally already in failed state and this step is not needed):
mdadm --fail /dev/md0 /dev/sda1
and now we can remove it:
mdadm --remove /dev/md0 /dev/sda1
This can be done in a single step using:
mdadm /dev/md0 --fail /dev/sda1 --remove /dev/sda1
4. Add a disk to an existing array
We can add a new disk to an array (replacing a failed one probably):
mdadm --add /dev/md0 /dev/sdb1
5. Verifying the status of the RAID arrays
We can check the status of the arrays on the system with:
cat /proc/mdstat
or
mdadm --detail /dev/md0
The output of this command will look like:
cat /proc/mdstat Personalities : [raid1] md0 : active raid1 sdb1[1] sda1[0] 104320 blocks [2/2] [UU] md1 : active raid1 sdb3[1] sda3[0] 19542976 blocks [2/2] [UU] md2 : active raid1 sdb4[1] sda4[0] 223504192 blocks [2/2] [UU]
here we can see both drives are used and working properly – U. A failed drive will show as F, while a degraded array will miss the second disk –
Note: while monitoring the status of a RAID rebuild operation using watch can be useful:
watch cat /proc/mdstat
6. Stop and delete a RAID array
If we want to completely remove a RAID array, we have to stop if first and then remove it:
mdadm --stop /dev/md0 mdadm --remove /dev/md0
and finally we can even delete the superblock from the individual drives:
mdadm --zero-superblock /dev/sda
Finally in using RAID1 arrays, where we create identical partitions on both drives this can be useful to copy the partitions from sda to sdb:
sfdisk -d /dev/sda | sfdisk /dev/sdb
(this will dump the partition table of sda, removing completely the existing partitions on sdb, so be sure you want this before running this command, as it will not warn you at all).
7. Recover from a broken RAID array
- Install GRUB on remaining hard drive
Prior to the removal of the failed hard drive, it is imperative to double-check GRUB has been installed on the remaining drive. In case of a non-hot-swap hard drive replacement, your system needs to be rebooted. If GRUB is not present on the remaining drive, your system will fail to boot.
So, let’s install grub on the MBR of the remaining hard drive.
Enter the Grub command line:
# grubFirst, locate the grub setup files:
grub> find /grub/stage1On a RAID 1 with two drives present you should expect to get:
(hd0,0) (hd1,0)Install grub on the MBR of the remaining hard drive if this hasn’t already been done:
grub> device (hd0) /dev/sdx (or /dev/hdb for IDE drives)

grub> root (hd0,0)

grub> setup (hd0)

grub>quit
This should ensure your system boots properly after your hard drive has been replaced. It is highly recommended to follow these steps during initial installation of your server. That way, if trouble come knocking, you are well prepared.
- Recreate the partition structure of the failed drive
To get the mirrored drives working properly again, we need to run fdisk to see what partitions are on the working drive:
# fdisk -l /dev/sda Command (m for help): p Disk /dev/hda: 255 heads, 63 sectors, 14946 cylinders Units = cylinders of 16065 * 512 bytes Device Boot Start End Blocks Id System /dev/hda1 * 1 13 104391 fd Linux raid autodetect /dev/hda2 14 14913 119684250 fd Linux raid autodetect /dev/hda3 14914 14946 265072+ fd Linux raid autodetectWe can copy the partition table from the working drive to the new drive: It may be necessary to add the –force token.
If sda has been replaced:
sfdisk -d /dev/sdb | sfdisk /dev/sdaIf sdb has been replaced:
sfdisk -d /dev/sda | sfdisk /dev/sdb- Rebuild the partition table
Now that the partitions are configured on the newly installed hard drive, we can begin rebuilding the partitions of this RAID Array. Please note that synchronizing your hard drive may take a long time to complete.
mdadm /dev/md1 --manage --add /dev/sda1
mdadm /dev/md2 --manage --add /dev/sda2
The rebuilding progress can be viewed by entering:
# cat /proc/mdstat Personalities : [raid1] read_ahead 1024 sectors md0 : active raid1 hdb1[0] hda1[1] 102208 blocks [2/2] [UU] md2 : active raid1 hda3[1] 262016 blocks [2/1] [_U] md1 : active raid1 hdb2[2] hda2[1] 119684160 blocks [2/1] [_U] [>....................] recovery = 0.2% (250108/119684160) finish=198.8min speed=10004K/sec unused devices:
The md0, a small array, has already completed rebuilding (UU), while md1 has only begun. After it finishes, it will show:
# mdadm -D /dev/md1 /dev/md1: Version : 00.90.00 Creation Time : Thu Aug 21 12:21:21 2003 Raid Level : raid1 Array Size : 119684160 (114.13 GiB 122.55 GB) Device Size : 119684160 (114.13 GiB 122.55 GB) Raid Devices : 2 Total Devices : 2 Preferred Minor : 1 Persistence : Superblock is persistent Update Time : Fri Oct 15 13:19:11 2004 State : dirty, no-errors Active Devices : 2 Working Devices : 2 Failed Devices : 0 Spare Devices : 0 Number Major Minor RaidDevice State 0 3 66 0 active sync /dev/hdb2 1 3 2 1 active sync /dev/hda2 UUID : ede70f08:0fdf752d:b408d85a:ada8922b8. Recreate Swap partition
Finally ensure the swap partition gets added to the array:
See current swap partition:
cat /proc/swapsRecreate the swap partition by issuing the commands below. Please ensure to change partition SDA3 to the correct partition as found when using the cat /proc/swaps command:
Filename Type Size Used Priority
/dev/sdb3 partition 522104 43984 -1
mkswap /dev/sda3 swapon -a
There are many other usages of MDADM particular for each type of RAID level, and I would recommend to use the manual page (man MDADM) or the help (MDADM –help) if you need more details on its usage. Hopefully these quick examples will put you on the fast track with how MDADM works.
Conclusion
In this article we have provided a small “cheat sheet” for MDADM and its usage on Linux server in the case that you have a software disks RAID array present. Most common issues of a server failing to start are due the disks errors.

Leave a Reply